
- This configuration requires that a SSO service, such as Okta, is available to your company. The company IT Department normally sets this up and provides the technical details
- A Prendio user with the Admin role is required to complete this process
- If the SSO radio button is not available for an Admin to select, then the feature must be requested for the Company account. Contact Prendio Technical Support by completing the Support Ticket Request Form
An admin for Okta will need to create a SAML application that will be used for the authentication. That application will need the following fields and values:
| Single sign on URL | https://procure.prendio.com/sso/Okta/auth |
| Use this URL for Recipient URL and Destination URL | (Checked) |
| Audience URI (SP Entity ID) | https://procure.prendio.com |
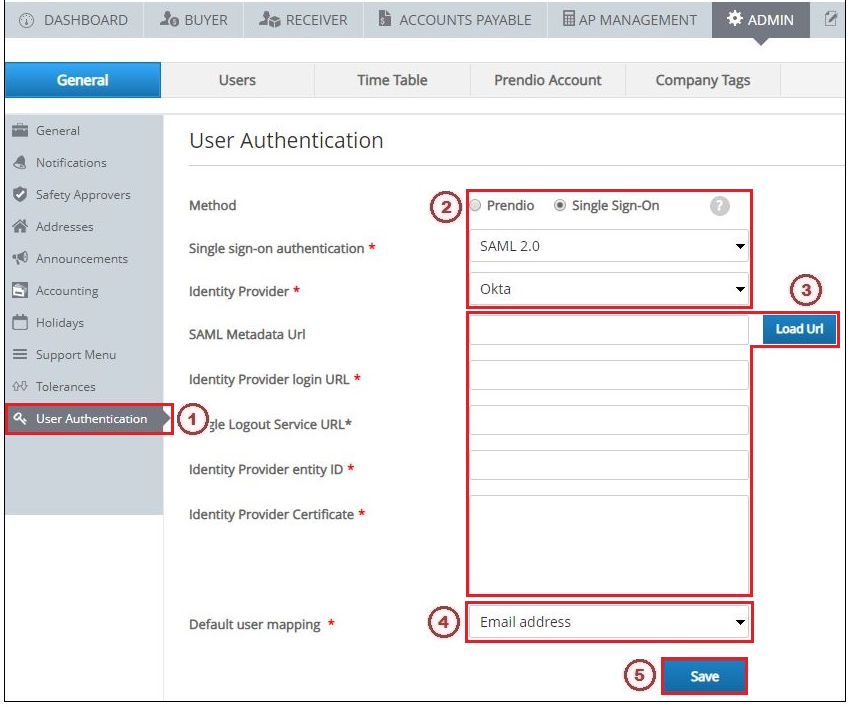
1. Go to [Admin > General] and click the User Authentication section
2. Select the Single Sign-On radio button, select "SAML 2.0" in the the Single sign-on authentication field, and select "Okta" in the Identity Provider field
3. The Company IT and Prendio Admin then need to input the SAML Metadata URL in that field and click the Load URL button. After clicking that button, the Identity Provider Login Url, Identity Provider entity ID, and the Identity Provider Certificate fields will automatically populate.
4. "Email Address" is the Default User Mapping used with Prendio SSO.
-png-Feb-10-2022-09-09-26-63-PM.png)
Enabling SSO Authentication for a User
-png-Feb-10-2022-09-09-31-13-PM.png)
6. Edit an account under [Admin > Users] and click the Authentication section
7. Select "SSO" in the Auth Metod field