
Updated on March 25, 2025
Packing slips and invoices for orders must be uploaded into Prendio via the Scan Upload section or by emailing these documents directly to a company's Scan Upload Email. Once uploaded, OCR technology extracts data to match each document to the corresponding purchase order to create receipts and vouchers. This automated approach enhances efficiency and accuracy, reflecting Prendio’s commitment to advancing document processing technology.
Uploading Packing Slips or Invoices
OCR Processing Documents in the Scan Match
Receipts Created from Automated Scan Match
Vouchers Created from Automated Scan Match
Watch a Video Demo of the OCR Feature
Uploading Packing Slips or Invoices
Packing slips should be uploaded in PDF format using the Scan Upload section. Please note that files over 12 MB, password-protected, or not in PDF format will be rejected.
Navigate to Scan > Scan Upload under the Receiver or Accounts Payable role:
Add files to select packing slips from your drive or drag and drop files into the queue. Click on Start upload to begin processing. The progress bar will display 100% completion when the upload is finished:
Alternatively, packing slips can be uploaded via the Scan Upload Email without logging into Prendio. The unique company email address is displayed in the Scan Upload section:
If using the Scan Upload Email, a status update will be sent to the sender confirming whether the upload was successful:
Successfully uploaded documents will move to Scan Match for further processing.
OCR Processing Documents in the Scan Match
Uploaded packing slips will appear in the Scan Match queue, where OCR technology automatically extracts and processes key details.
Navigate to Scan > Scan Match to view uploaded packing slips.
Uploaded documents will display at the top where the OCR tool will automatically attempt to match each document to an existing PO. Files in progress will display a loading indicator to the top right of the document and all fields will be greyed out until the process is complete: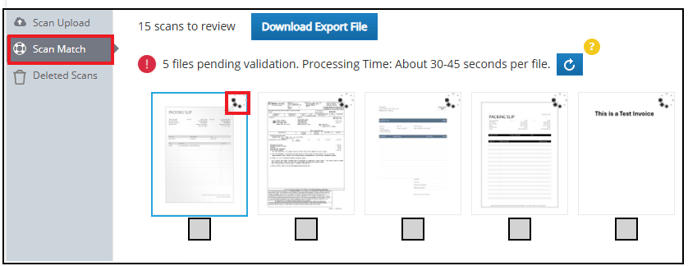
A message will appear indicating the number of files uploaded from Scan Upload. The validation process takes between 30-45 seconds per file, but users can also select the Refresh button to update progress:
OCR matches the packing slip or invoice details with the corresponding purchase order. Once matched, packing slips will move to the Receipts tab of the Receiver role for final processing. Invoices will move to the Vouchers tab of Accounts Payable for review.
If a document cannot be matched to an existing PO, the document will remain in the Scan Match queue with a note icon located on the top right of the document:
For any documents not matched to a PO, OCR will automatically complete any detected fields and Scan Notes will be added to indicate why a receipt or voucher could not be created:
These documents require manual review. Users may need to manually add in the packing slip or invoice details in the Scan Match before the document can move to Receipts or Vouchers.
Locating Scans with Notes
Scans that include OCR-generated notes—such as details about why a match could not be completed—will appear after scans without notes in the Scan Match queue. As a result, users may need to scroll through multiple pages to locate them.
At times, it may not be immediately clear that OCR is adding notes and repositioning those scans toward the end of the queue. This can create the impression that a scan did not upload, when in fact it was simply moved based on note placement.
To ensure all documents are accounted for, it is recommend that users review all pages in the Scan Match queue, especially those toward the end, when looking for scans that contain notes.

Receipts Created from Automated Scan Match
Receipts are generated from packing slips to confirm that delivered items match the order details.
Navigate to the Receiver role followed by Receipts to review generated receipts.
Receipts created through OCR can be identified by an automatic note that includes the date, time (ET), and the message: Receipt created via automated scan match process:
Receipts generated via the automated scan match will automatically be assigned a receipt number. Users can determine whether the receipt has been reviewed and confirmed via the Receipt Status column. Receipts that must be reviewed will have a Scanned status:
Select the View (eyeball icon) in the Actions column to view receipt details.
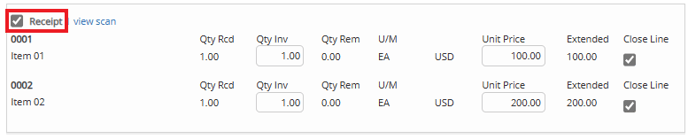
OCR matches the packing slip details with the corresponding purchase order and automatically add in the Qty Received for each line on the packing slip. Users must verify the quantities are correct and make adjustments if needed:
When complete, users can select Done, Next:
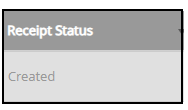
Users can sort and organize receipts via Receipt Status to determine if any receipts in Scanned status must be reviewed to update to Created status.
Vouchers Created from Automated Scan Match
Navigate to the Accounts Payable role followed by Vouchers to review invoices.
Vouchers created through OCR can be identified by an automatic note that includes the date, time (ET), and the message: Voucher created via automated scan match process along with details on whether an associated receipt is available for the voucher:
If a receipt is not available for the voucher, No available receipts will be indicated in the Available Receipts column. Please note that a voucher cannot be processed until a corresponding receipt is available:

Select View in the Actions column to open voucher details:

OCR captures all invoice details, including tax and freight. Users must review the voucher to ensure accuracy by selecting the correct receipt(s):
If a receipt is not available, users will see No Receipt Available and will not be able to proceed further with the voucher:

After selecting the correct receipt(s) that matches the invoice, verify that the total invoice amount in Prendio matches the actual invoice total and that all details, including tax and freight, are accurate. Make adjustments if needed:

Watch a Video Demo of the OCR Feature