
Note: If a Segment does not exist in the ERP System, these must first be added to the ERP System and synchronized in Accounts Payable to or a Let's Align to Map these to Prendio.
AP Management > AP Push

In these examples Supplier not found in ERP and GL Account not found in ERP displays for these vouchers. This means that a Let’s Align is needed:


Users can perform a Let’s Align to map these areas. Select Let's Align:

A Let's Align window opens. Users can select Refresh to connect Prendio with the ERP system. Note that QuickBooks Online is used as the ERP system in this example.
If Refresh was grayed out, Renew Connection would need to be pressed to renew the connection with Quickbooks Online first. Refresh is then pressed to connect Prendio with the ERP system. Renew Connection is not available for other ERP systems and users can proceed to select Refresh:

When Prendio connects with the ERP system, Awaiting Refresh is displayed in the Let’s Align window. The System Activity field captures feedback during the Let’s Align Process.
Prendio will detect the unmapped suppliers and segments during the Let's Align and list them for the user:

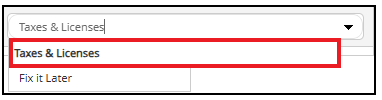
The Suppliers and Accounting Segments that need alignment were found. Typing the name of the supplier via the ERP field to see if a match in the ERP system is listed:

If a match is found, users can select that supplier to map the ERP Equivalent to the Prendio supplier. If a supplier is not found, the supplier does not exist in the ERP system. Users can select Create New Supplier to allow Prendio to automatically create the supplier in the ERP system (along with remit address and payment terms) and map the supplier:


Select Send to ERP to complete the mapping process for any suppliers or segments. The Let’s Align window will automatically close when the alignment is complete:
![]()
Suppliers and segments that have been mapped after completing a Let's Align will no longer contain an error message:


If an error message still appears, refresh the page:

The vouchers will be ready to push to the ERP system.