
- Mapping Overview
- QBD Setup
- Managing QBD List Values
- Connecting Prendio to QBD
- Validate connection from Prendio to QBD
- Support for QBD and Payment Services
Notes:
- You must be an admin for the QBD company file. You might also be prompted by the operating system to approve administrator actions related to installing the integration components.
- When syncing as part of this integration, only one instance of the QuickBooks Web Connector (QBWC) can be open. Having multiple QBWC instances connecting to one company in Prendio at the same time can cause unexpected behavior and possible data problems.
- The Prendio-QuickBooks Desktop integration does not support the sending of AP Push PDF along with bills.
- Settings for QBD are provided here for the purpose of integration. If there are any questions or problems related to any of those settings, please contact QuickBooks Support.
Mapping Overview
Prendio connects to the QuickBooks Web Connector (QBWC), which handles the data exchange between Prendio and QBD. You must configure QBD appropriately before using this integration.
This table shows the default mapping of Prendio Segments to QBD Segments:
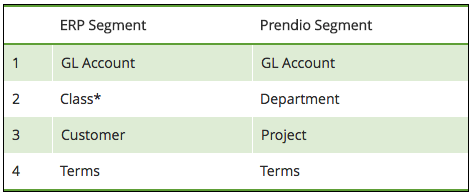
In order for the Prendio QBD connector to work correctly, the following must be enabled in QBD:
- Classes - One to each row in transaction
- (Optional) Multiple Currency to allow each Supplier/Vendor to have a different currency for its transactions. Note that you cannot reverse the action of enabling Multicurrency. See this QuickBooks Help Document for more information.
Regarding the other accounting segments:
- GL Accounts - Enabled by default in QuickBooks. No changes are needed to support the integration with Prendio.
- Terms - Enabled by default in QuickBooks. No changes are needed to support the integration with Prendio.
- Projects - Projects are considered "Jobs" in QBD. Jobs that existing under Customers in QBO, which is why you often see Customer and Job referenced together in QBO.
Note: Project is an optional accounting segment in Prendio.
QBD does not have Location or other accounting segments for bills. So, there are no other mappings that can be done between accounting segments for Prendio and QBD.
QBD Setup
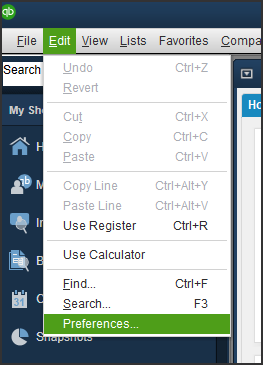
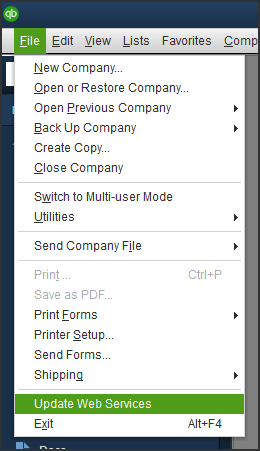
- After opening QBD, go to the menu option [Edit > Preferences].
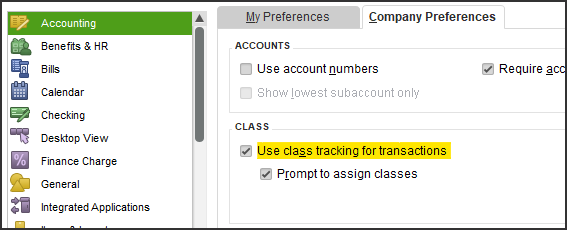
- Go to the Accounting section and Company Preferences tab.
- Check the option for Use class tracking for transactions.
- Optional: If you expect to push bills with non-USD currencies in Prendio, you must enable multiple currencies. This setting in available in the Multiple Currencies section and Company Preferences tab.
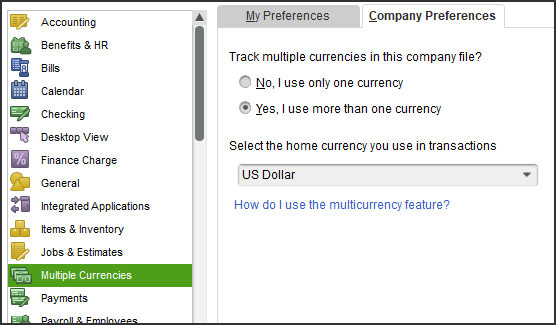
Make sure to review any warnings about enabling this feature, including how you cannot disable this feature after making the change.
Managing QBD List Values
Classes and Sub-Classes - Both classes and sub-classes are supported by the integration. Classes and sub-classes are separated with a colon when synced over to Prendio, like in format: "R&D:Chemistry".
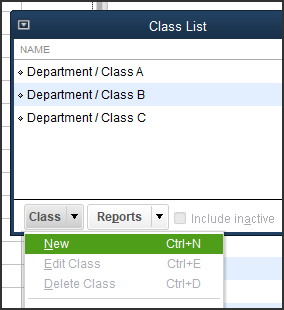
In QBD, go to the menu option [Lists > Class List].
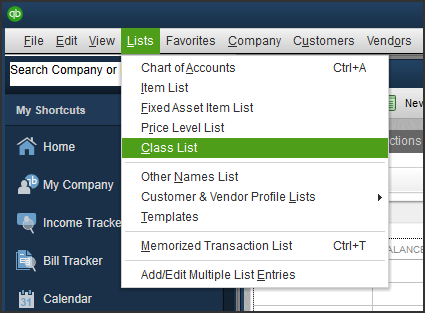
In the Class List window, click the Class pull down menu to create, edit, or remove Classes.
Accounts and Sub-Accounts - Both accounts and sub-accounts are supported by the integration. Accounts and sub-accounts are separated by a colon when synced over to Prendio, like in format: "Lab Supplies:Reagents".
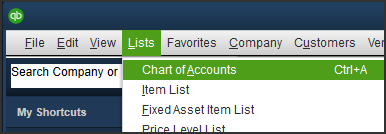
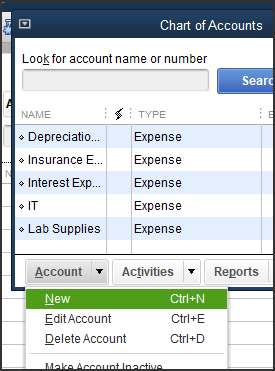
In QBD, go to the menu option [Lists > Chart of Accounts].
In the Chart of Accounts window, click the Account pull down menu to create, edit, or remove a GL Account. If creating one, select the account type (typically "Expense" for use in Prendio) and following the remaining prompts.
Customers / Jobs (Projects) - Jobs in QBD are similar projects in QuickBooks Online. Jobs exist under parent Customer records. Customers and Jobs will both sync over for mapping to the Prendio Projects segment. Jobs appear similar to sub-classes and sub-accounts, as they are separated from their parent Customer by a colon. ("Customer A:Jjob B")
It is your discretion if you want to use Customer or Jobs as a mapping point for Projects in Prendio.
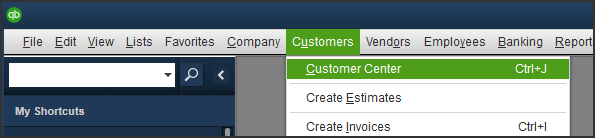
In QBD, go to the menu option [Customers > Customer Center].
In Customer Center, click the New Customer & Job pull down menu. Select either New Customer or Add Job. Follow the prompts to complete its creation.
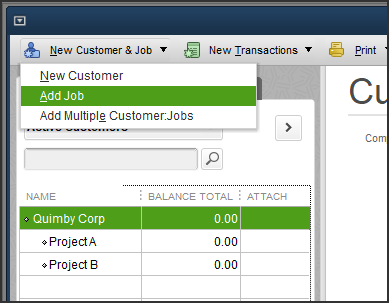
Note: At least one customer record must exist when clicking Add Job.
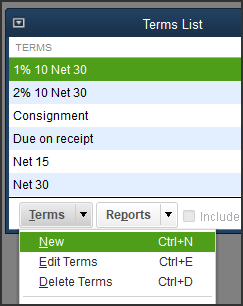
Terms - In QBD, go to the menu option [Lists > Customer & Vendor Profile Lists > Terms List].

In the Terms List window, click the Terms pull down menu to create, edit, or remove terms.
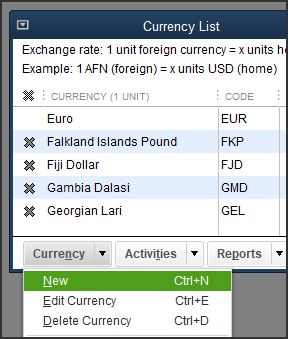
Currency (Multiples Currencies Only) - In QBD, go to the menu option [Company > Manage Currency > Currency List].
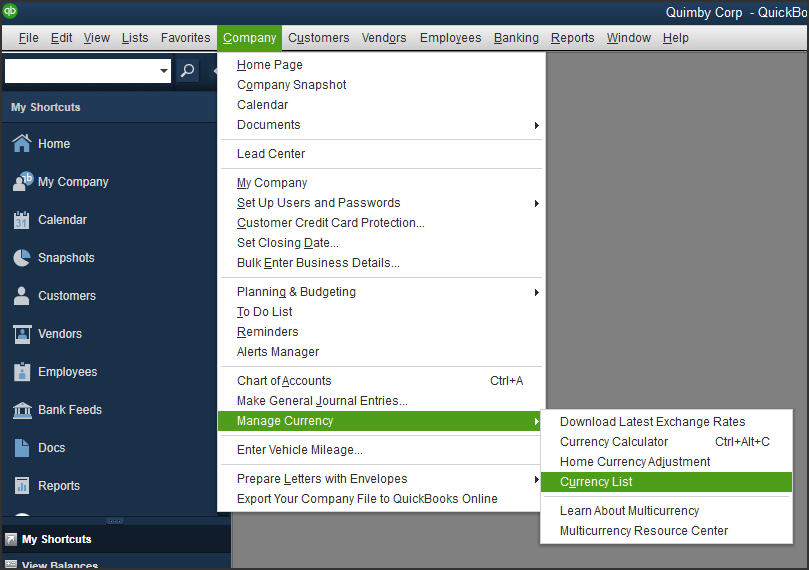
In the Currency List window, click the Currency pull down menu to create, edit, or delete a currency.
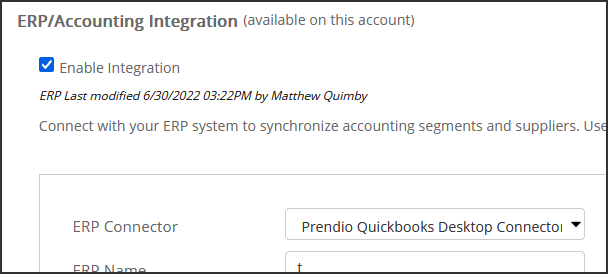
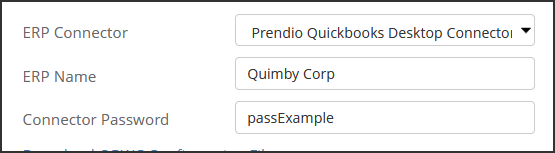
- ERP Name - The company name in QBD
- Connector Password - The password to be used when setting up the QuickBooks Web Connector
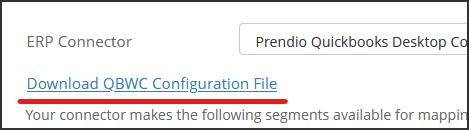
3. When you are ready to setup with QuickBooks Web Connector (QBWC), click the Download QBWC Configuration File link.
5. When QuickBooks Web Connector (QBWC) opens, go to the menu option [File > Add an Application].
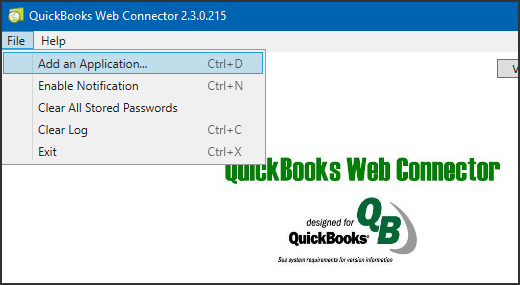
6. Select the file downloaded from Prendio. The default file name is "Quickbook.qwc"
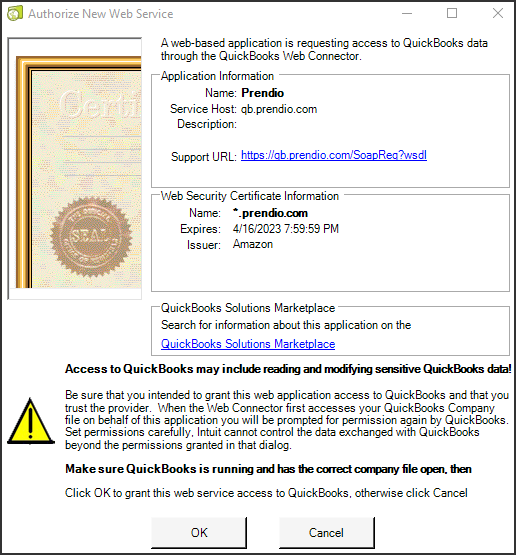
7. Click the OK button in the Authorize New Web Service window.
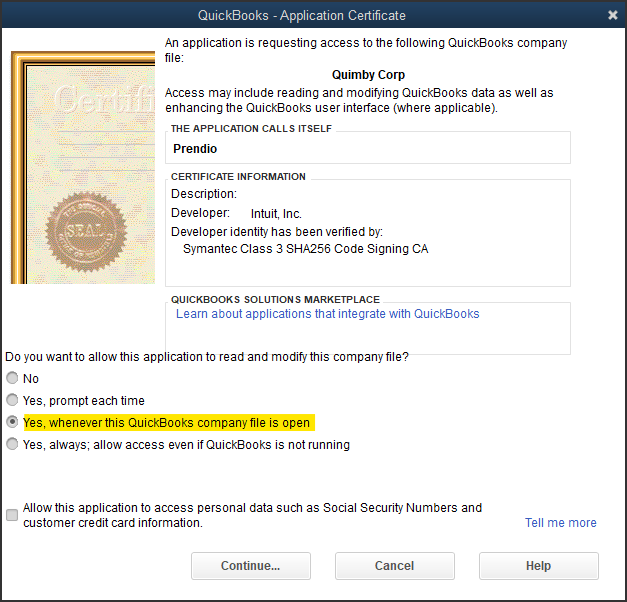
8. Back in QBD, a QuickBooks - Application Certificate window opens. Select the option Yes, whenever this QuickBooks company file is open and click the Continue button.
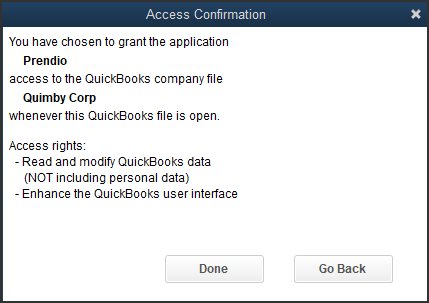
9. Verify the details in the Access Confirmation window and click the Done button.
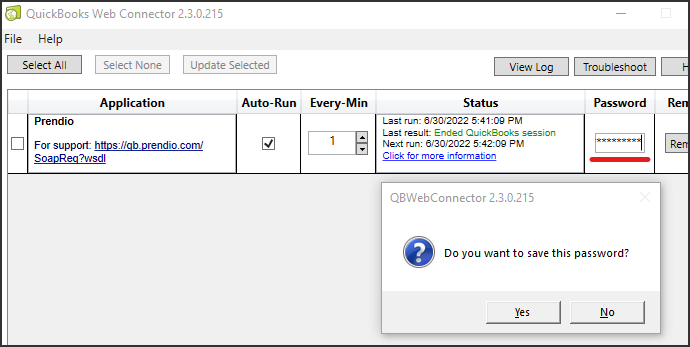
10. A "Prendio" application is now available in QBWC. Type the same password you provided to Prendio Technical Support in the Password field and press Enter on your keyboard. When prompted to save your password, click the Yes button.
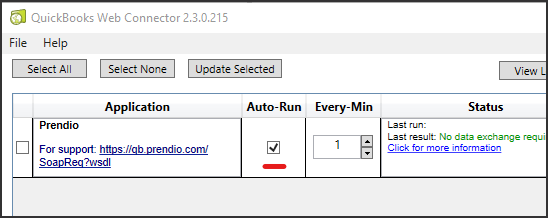
11. Check the Auto-Run option for the Prendio application.
After following these steps, you can integrate so long as Prendio, QuickBooks Desktop, and QuickBooks Web Connector are all open on the same computer.
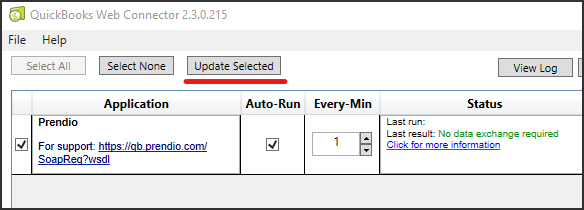
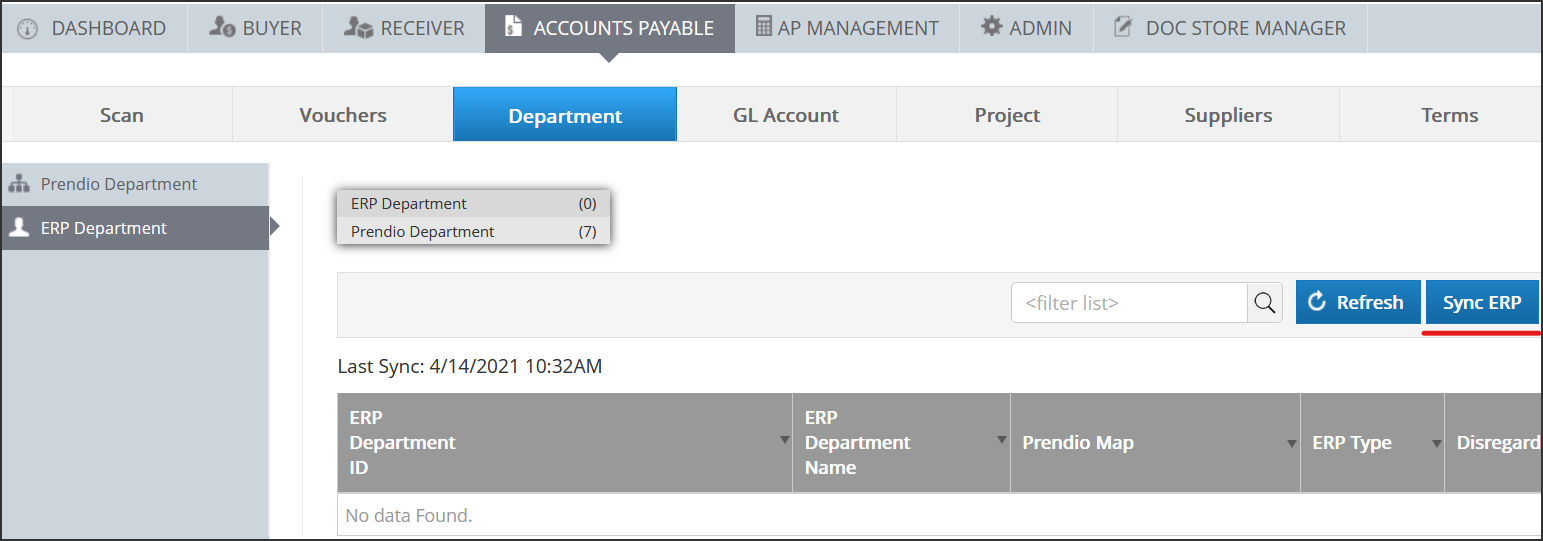
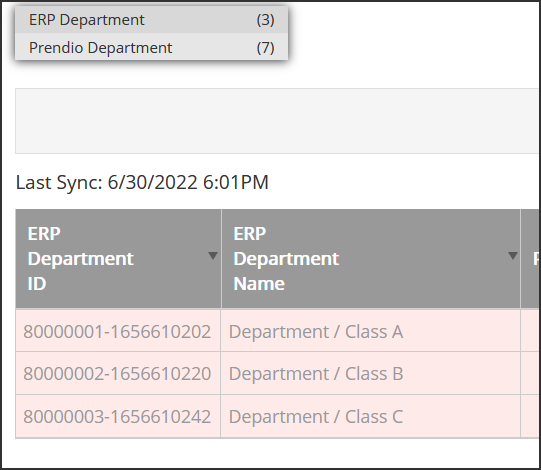
5. In QBWC, wait for the Prendio application to Auto-Run or click the Update Selected button. You should see confirmation of activity in the Status column.

6. After this, the ERP Department table is updated with the latest list of classes from your QBD company.
Support for QBD and Payment Services
While Prendio integrates with QBD, the Prendio team does not directly support QBD itself. For QBD problems and questions unrelated to the integration with Prendio, the following resources are available:
It is possible to integrate QBD with payment services such as BILL. As long as that service syncs the payment info back to QBD for bills, the Prendio bill payment sync process will continue working without a problem. If there is a problem with the integration between QBD and your payment service, you need to contact the support team for the payment service.