
- Mapping Overview
- QBO Setup
- Managing QBO List Values
- Connecting Prendio to QBO
- Support for QBO and Payment Services
Notes:
- You must have a QBO account with your company that gives you the appropriate access for making configuration changes or carrying out tasks such as adding a Class. If you are unsure of your access privileges, contact your QBO master administrator for clarification.
- Settings for QBO are provided here for the purpose of integration. If there are any questions or problems related to any of those settings, please contact QuickBooks Support.
Mapping Overview
Prendio uses a QuickBooks Online Connector to enable communication with QBO. You must configure QBO appropriately before using the connector.
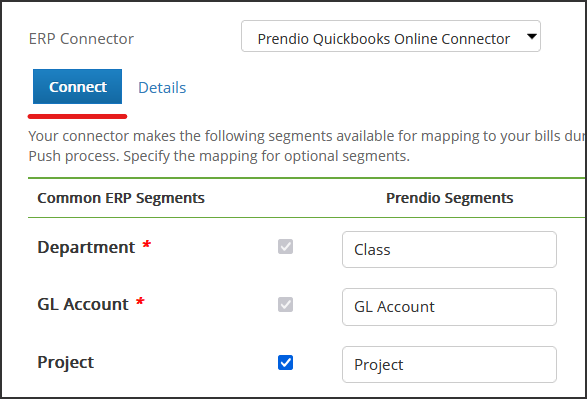
This table shows the default mapping of Prendio Segments to QBO Segments:
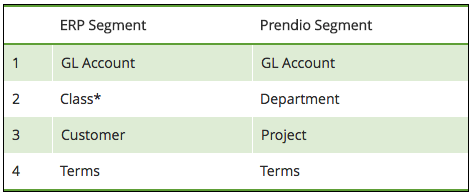
In order for the Prendio QBO connector to work correctly, the following must be enabled in QBO:
- Classes - One to each row in transaction
- Track Expenses and Items by Customer
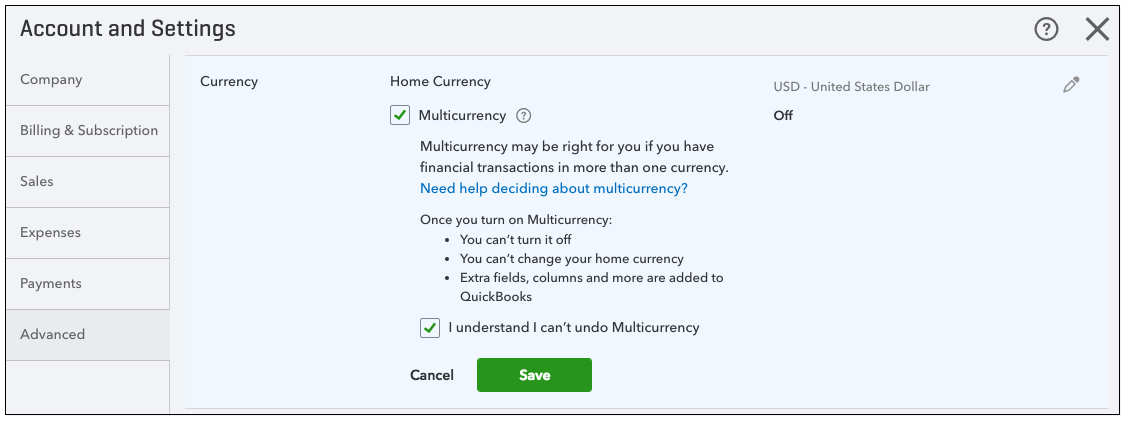
- (Optional) Multicurrency to allow each Supplier/Vendor to have a different currency for its transactions. Note that you cannot reverse the action of enabling Multicurrency. See this QuickBooks Help Document for more information.
Regarding the other accounting segments:
- GL Accounts - Enabled by default in QuickBooks. No changes are needed to support the integration with Prendio.
- Terms - Enabled by default in QuickBooks. No changes are needed to support the integration with Prendio.
- Projects - Must be supported by the edition of QBO used by your company and enabled. Projects are objects that existing under Customers in QBO, which is why you often see Customer and Project referenced together in QBO.
Regarding the Location field in QBO:
- Location values are not stored line-by-line in QBO. They are only stored in the bill header. For this reason, the Location field is not recommended for use with the integration for Prendio and QBO
- Depending on the version of QBO being used, it is possible to define different labels for the Location field, including "Department". Do not use the Department label without guidance from the Prendio Technical Support team. Using that label changes the default mapping behavior between Prendio and QBO
QBO Setup
On the QBO dashboard, click the gear icon in the upper-right corner of the page and select Accounts and settings in the Your Company section. Once there, you will configure QBO for integration with Prendio.
Note: These settings might be located in different tab depending on the version of QBO used by your company.
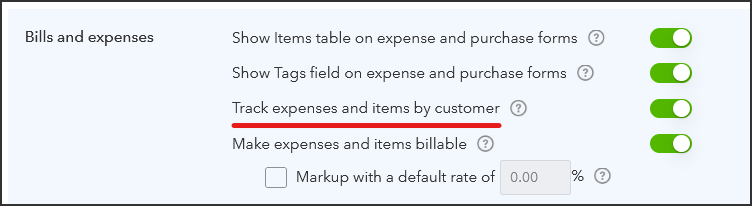
In the Expenses tab, edit the Bills and expenses section. Enable the setting Track expenses and items by customer.
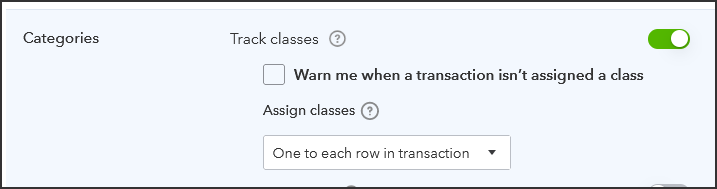
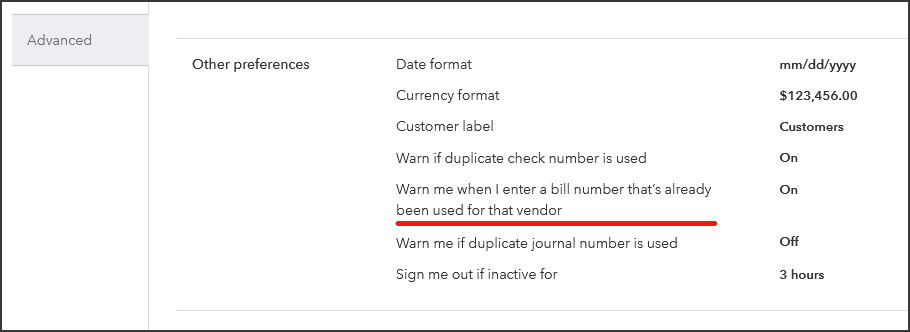
In the Advanced tab, edit the Categories section. Enable Track classes. In the pull down for Assign Classes, select "One to each row in transaction".
Managing QBO List Values
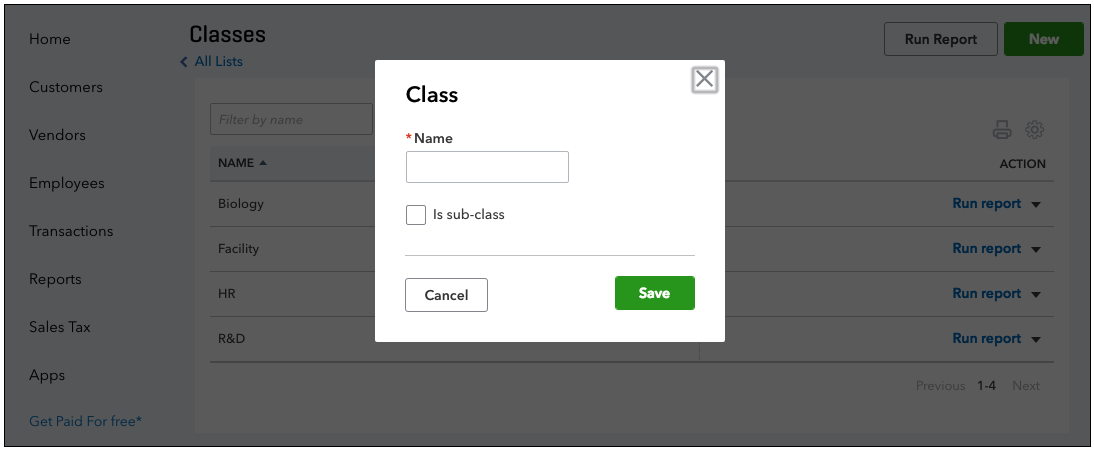
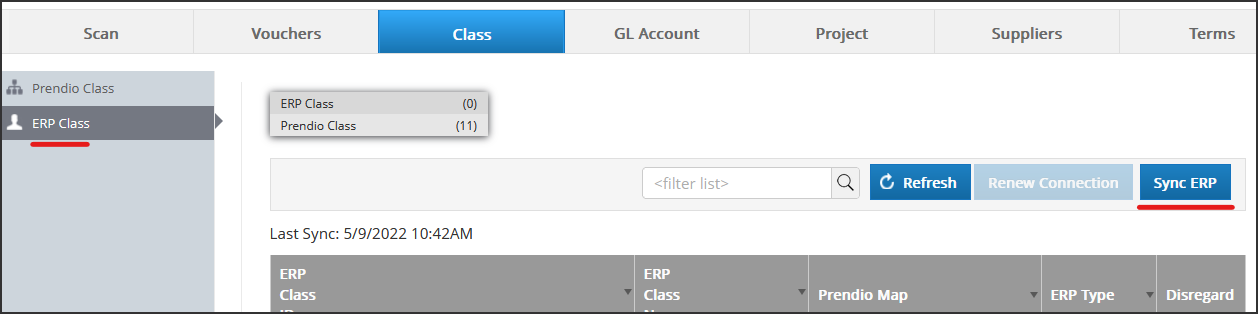
Classes and Sub-Classes - Both classes and sub-classes are supported by the integration. Classes and sub-classes are separated with a colon when synced over to Prendio, like in format: "R&D:Chemistry".
On the QBO dashboard, click the gear icon in the upper-right corner of the page and select All lists in the Lists section. Click the link for Classes to make the necessary changes.
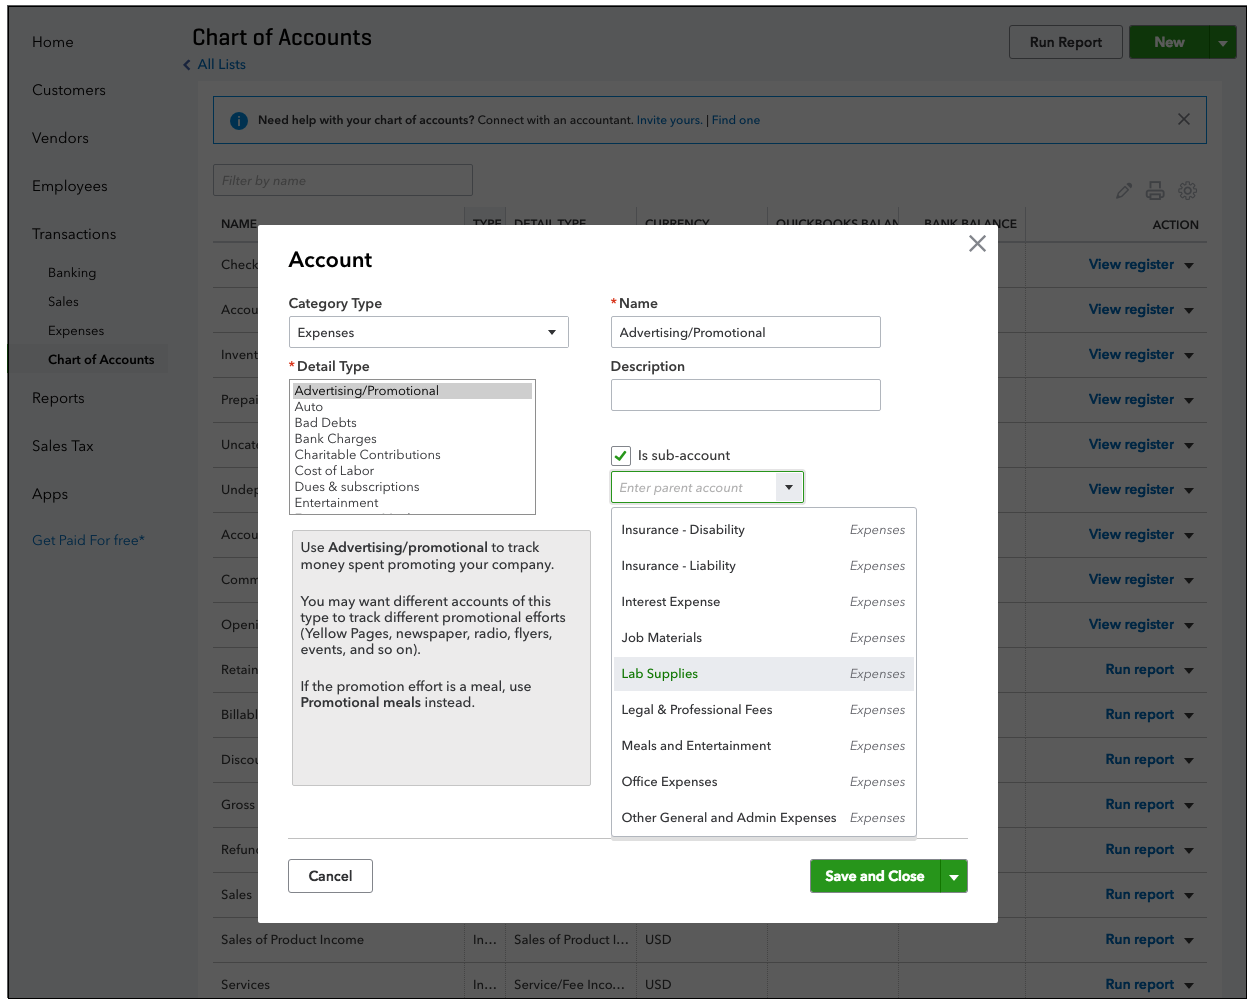
Accounts and Sub-Accounts - Both accounts and sub-accounts are supported by the integration. Accounts and sub-accounts are separated by a colon when synced over to Prendio, like in format: "Lab Supplies:Reagents".
On the QBO dashboard, click the gear icon in the upper-right corner of the page and select All lists in the Lists section. Click the link for Chart of Accounts to make the necessary changes.
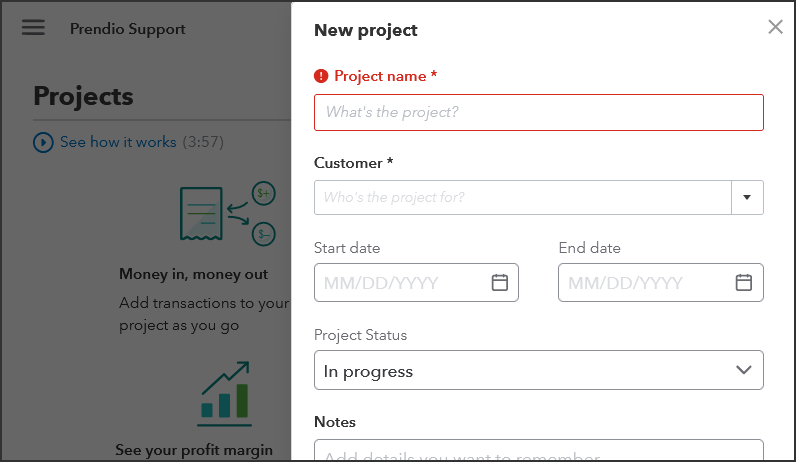
Customers / Projects - Projects in QBO exist under parent Customer records. Customers and Projects will both sync over for mapping to the Prendio Projects segment. Projects appear similar to sub-classes and sub-accounts, as they are separated from their parent Customer by a colon. ("Customer A:Project B")
On the QBO dashboard, click Projects in the left navigation menu to make the necessary changes.
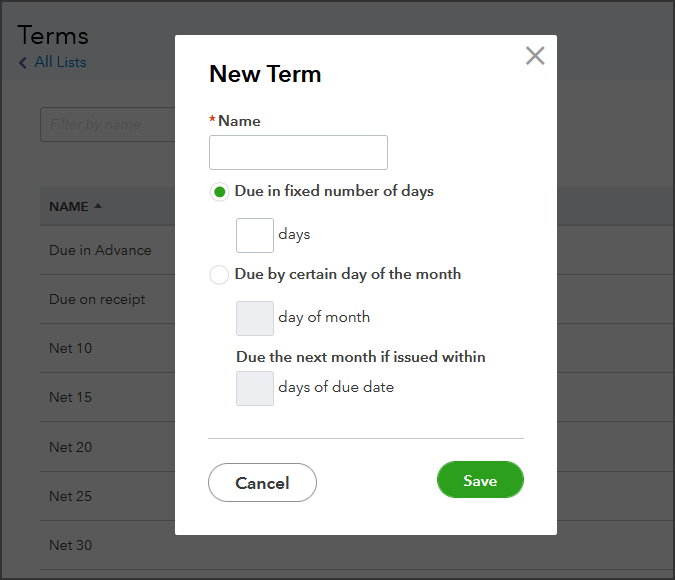
Terms - On the QBO dashboard, click the gear icon in the upper-right corner of the page and select All lists in the Lists section. Click the link for Terms to make the necessary changes.
Currency (Multicurrency Only) - On the QBO dashboard, click the gear icon in the upper-right corner of the page and select All lists in the Lists section. Click the link for Currencies to make the necessary changes.

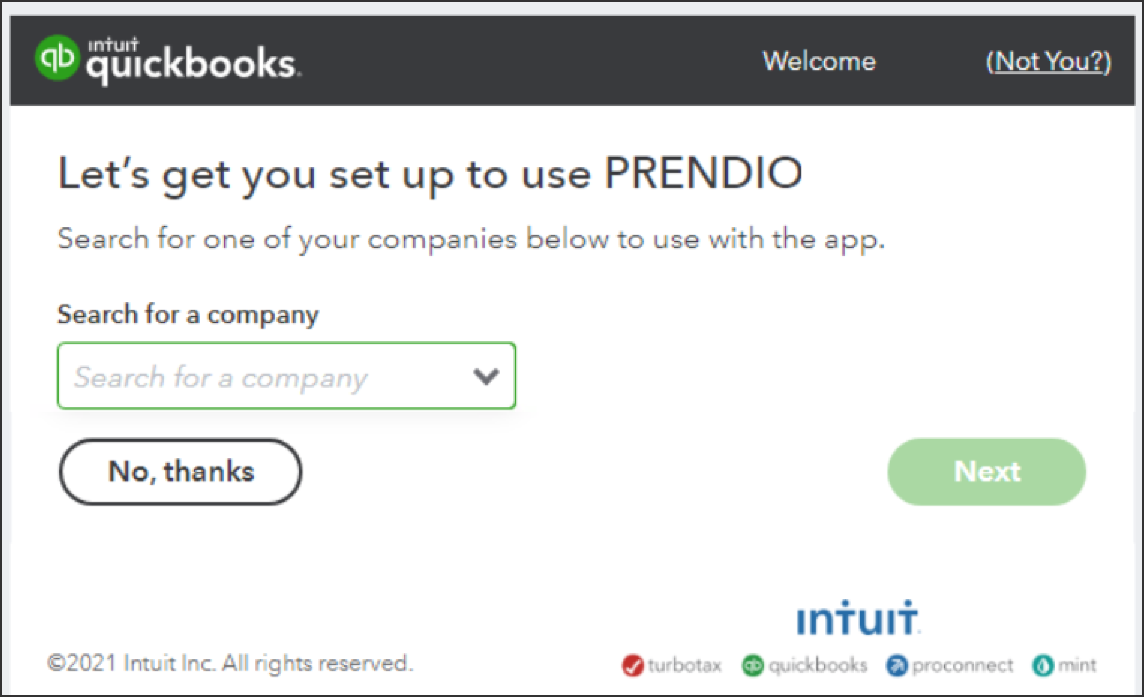
3. You are prompted to provide your QBO login information. Once logged in, you might be prompted to select a company and accounting firm, depending on how many companies you access in QBO. Make sure to select the same company that applies to the Prendio company.

Support for QBO and Payment Services
While Prendio integrates with QBO, the Prendio team does not directly support QBO itself. For QBO problems and questions unrelated to the integration with Prendio, the following resources are available:
It is possible to integrate QBO with payment services such as BILL. As long as that service syncs the payment info back to QBO for bills, the Prendio bill payment sync process will continue working without a problem. If there is a problem with the integration between QBO and your payment service, you need to contact the support team for the payment service.