
Updated on May 28, 2024
Noting The User's Delegate, Personal Approval Path, And Approver/Watcher Responsibilities
Deactivating A Prendio User Profile
Deleting The User Profile (Only if Necessary)
Video Tutorial of Deactivating a User
It is now required that all open Requisitions or Purchase Orders (PO) for a user be reassigned before their account can be deactivated. When attempting to deactivate, if Prendio detects that the user is the Requester for any open orders, the Reassign Purchase Orders / Requisition window automatically opens with a warning that orders must be reassigned:


For more information, see the help doc Reassign Purchase Orders and Requisitions to Different Requesters.
- Before deactivating a user, the Prendio Admin should note where the user is involved as an approval delegate, spending limit approver in other users' personal approval paths, and segment approver/watcher. This information is used to make the necessary edits to the profiles of anyone impacted by this change.
Noting The User's Delegate, Personal Approval Path, And Approver/Watcher Responsibilities
Locate the Admin role and Users tab:

Find the user and click the Edit button:


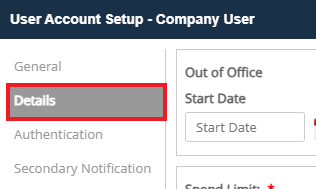
Scroll to the end of the Details section to locate the user's Delegate, Personal Approval Path, and Approver/Watcher responsibilities:

Take a note or create a screen capture of this information for reference during the editing of the users that will be impacted by this change.
Deactivating A Prendio User Profile
Locate the Admin role and Users tab:
Find the user and click the Edit button:


If the user has open orders, follow the steps to reassign those orders:

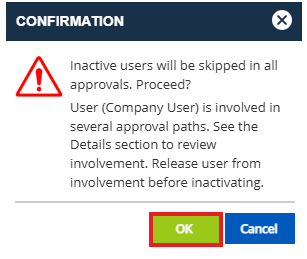
If prompted, provide a reason for deactivating the user and click Submit:

Back at the User Account Setup window, select Save. Exit out of the User Account Setup window when complete:

The user's account has been deactivated and will no longer appear in the table of Active users. To view any deactivated accounts, select Include Inactive:
![]()
Deactivated accounts will appear with an Inactive status:

Deleting The User Profile (Only if Necessary)
Note: It is highly recommended to avoid deleting user profiles unless necessary. Prendio user licensing charges do NOT apply to inactive users and those users do not appear in the Users table by default. Keeping users inactive allows you to refer to them for historical purposes or reactivate them should their access be required again in the future.
Locate the Admin role and Users tab:
Select the Include Inactive box:
![]()
Find the inactive user and select Delete:

Confirm Yes to delete:

A success message will appear at the top of the screen:
![]()
The user will no longer appear in the table of users even if Include Inactive is selected.
Video Tutorial of Deactivating a User