
November 11, 2026
Users must create the SCIM 2.0 application in Okta that connects your identity provider to Prendio for automated user provisioning.
After this application is set up, Okta can automatically create, update, and deactivate Prendio user accounts — including each user's approval limit and spend limit. This is a one-time setup completed by your Okta administrator.
This guide covers creating the Okta application only. For day-to-day tasks such as provisioning, updating, and offboarding users, see SCIM Integration With Okta.
Create the SCIM 2.0 App in Okta
Add the Prendio Custom Attributes
Prerequisites
Make sure the following are in place before starting setup:
- Administrator access to the Okta Admin Console
- SCIM provisioning enabled on your Prendio account — contact your Account Manager to get started
- The SCIM 2.0 Base URL and API token generated in Prendio under Admin > User Provisioning
Note: Department names in Prendio should match the department names in Okta exactly, so users land in the correct department when they are provisioned.
Create the SCIM 2.0 App in Okta
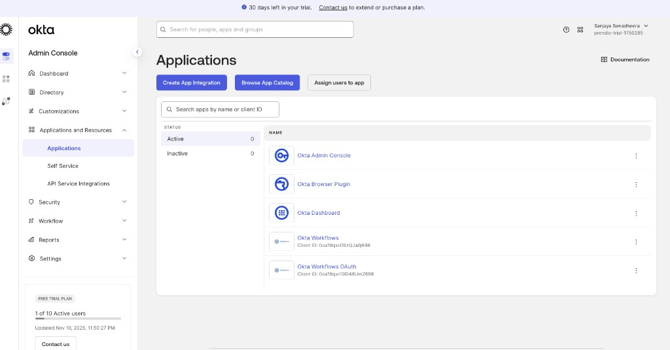
- Sign in to the Okta Admin Console. In the left navigation, go to Applications and Resources > Applications, then click Browse App Catalog.
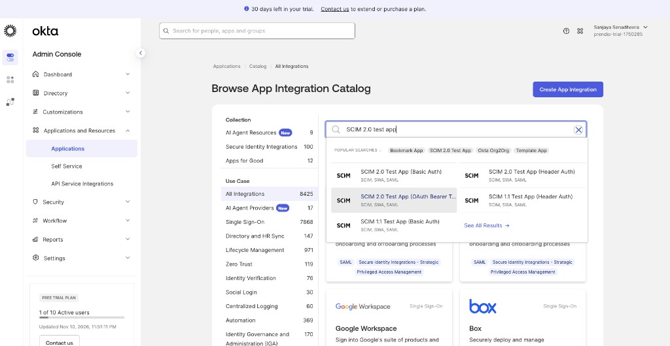
- In the search box, type SCIM 2.0 test app and select SCIM 2.0 Test App (OAuth Bearer Token) from the suggestions.
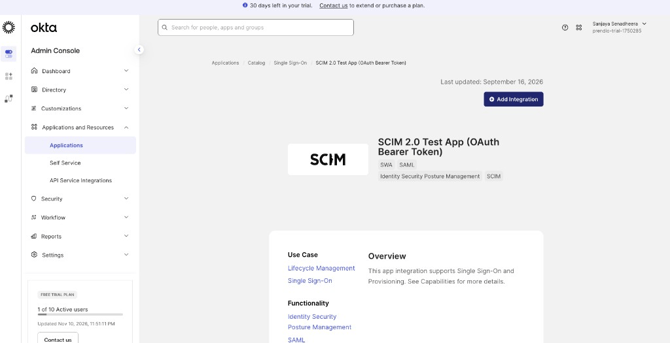
- On the app overview page, click Add Integration.
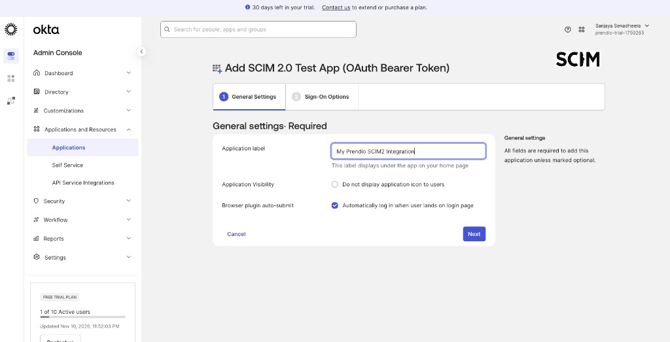
- On the General Settings tab, enter an Application label (for example, My Prendio SCIM2 Integration), then click Next.
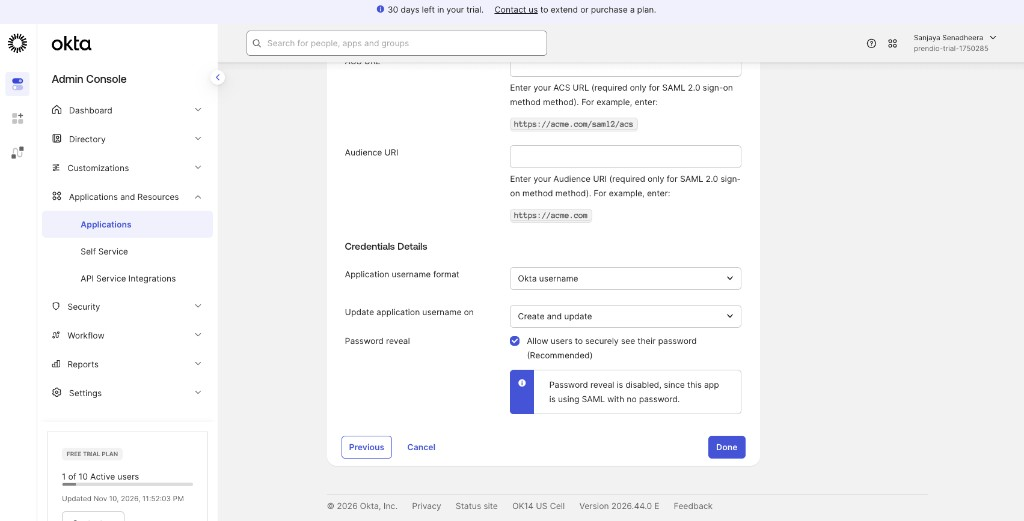
- On the Sign-On Options tab, keep the default settings, scroll to the bottom, and click Done.
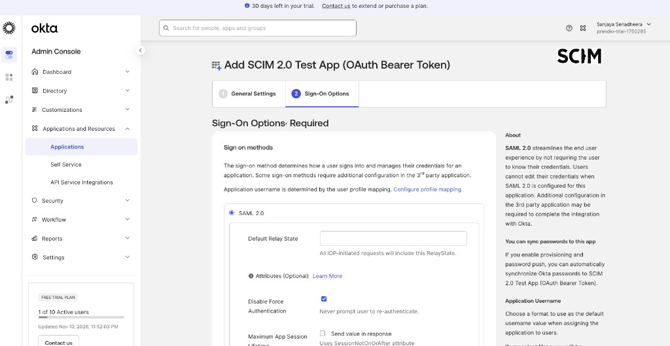
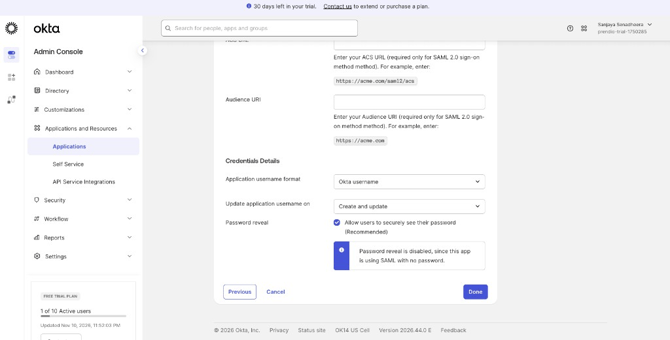
Note: Configuring SAML on the Sign On tab is optional. Only set it up if you want to use this same app for single sign-on (SSO) as well — it is not required for provisioning. For SSO setup, see Configuring Prendio With Okta SSO Authentication.
Connect Okta to Prendio
With the app created, connect it to your Prendio account using the credentials from Prendio.
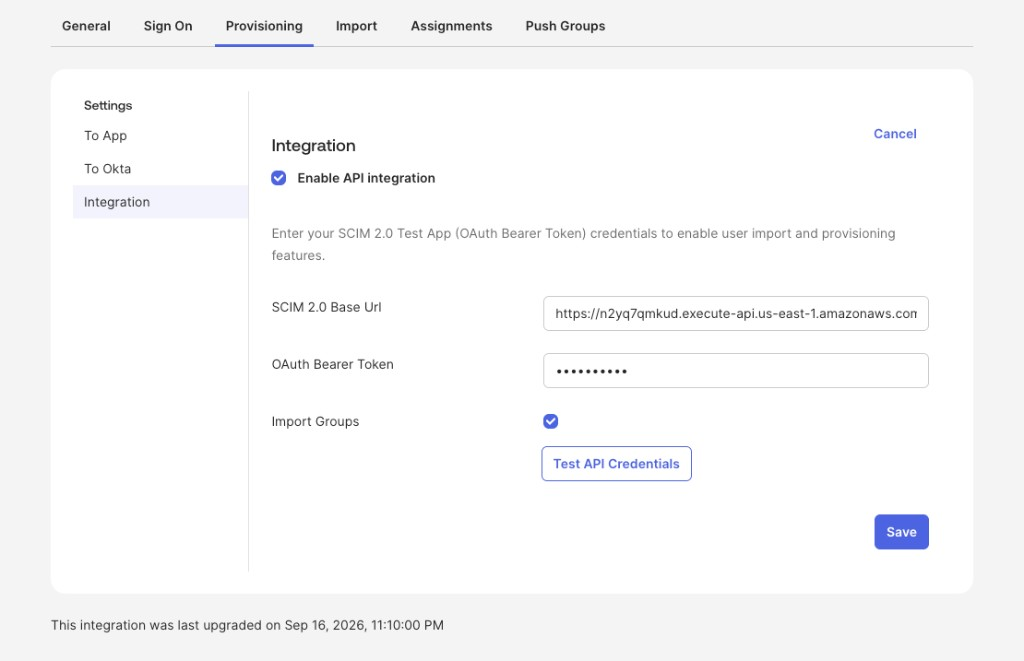
- Open the new app and select the Provisioning tab. Provisioning is not enabled yet, so click Configure API Integration.
- Select Enable API integration.
- Paste the SCIM 2.0 Base URL and OAuth Bearer Token generated in Prendio under Admin > User Provisioning.
- Click Test API Credentials to confirm the connection, then click Save.
Enable Provisioning
- On the Provisioning tab, go to To App and click Edit.
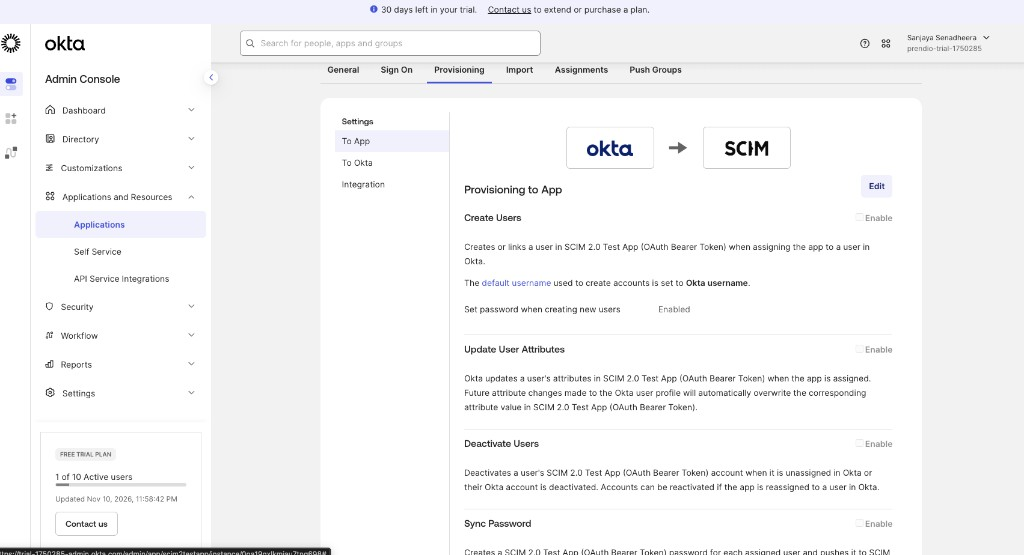
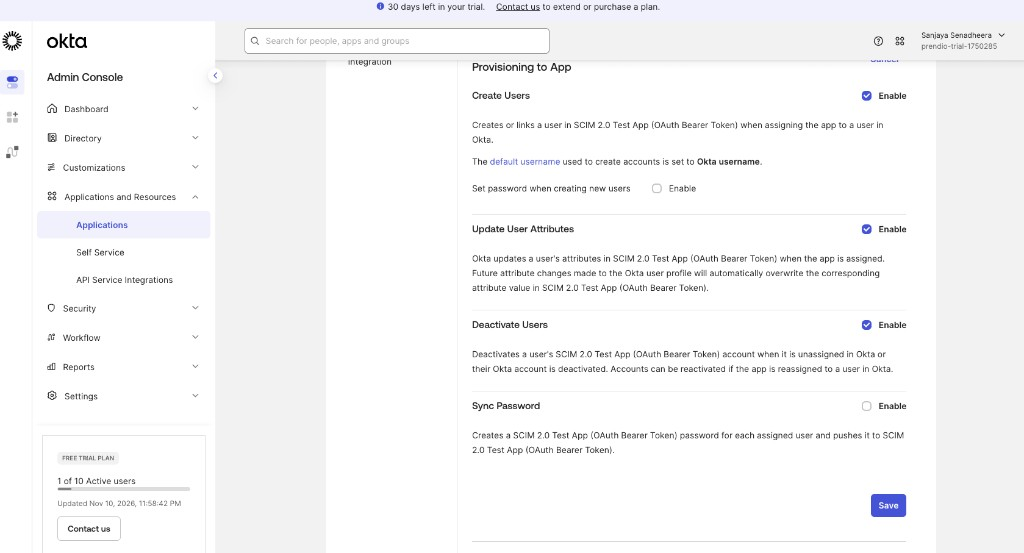
- Select Enable for each of the following options:
- Create Users — creates the user's Prendio account when the app is assigned to them in Okta
- Update User Attributes — pushes changes made in Okta to the user's Prendio profile
- Deactivate Users — deactivates the user's Prendio account when they are unassigned or deactivated in Okta
- Click Save.
Add the Prendio Custom Attributes
Prendio uses two custom attributes to sync each user's approval limit and spend limit. Without them, these limits will not populate when users are provisioned.
- Go to Directory > Profile Editor and open the profile for your app (for example, My Prendio SCIM2 Integration User).
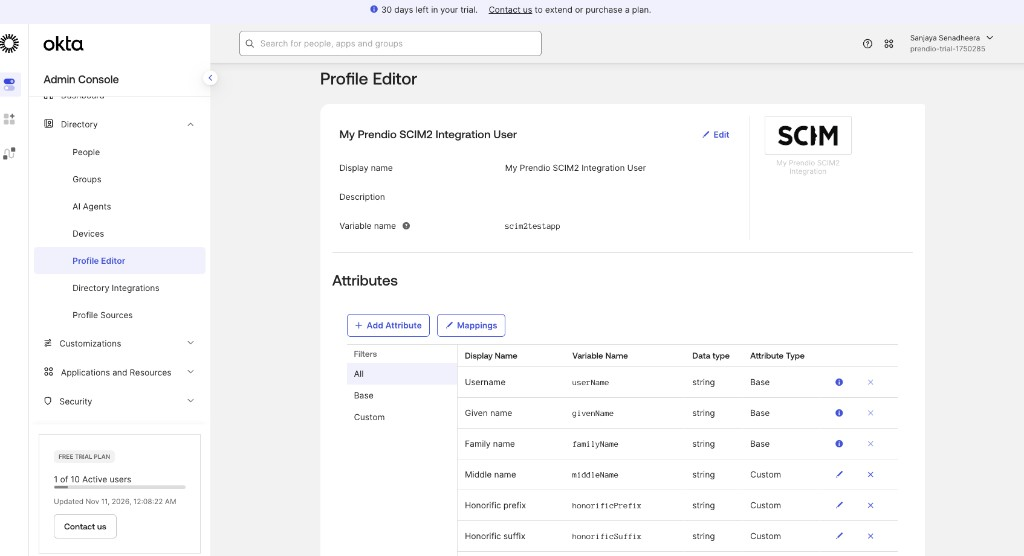
- Click Add Attribute.
- Enter the values for prendioApprovalLimit from the table below, then click Save.
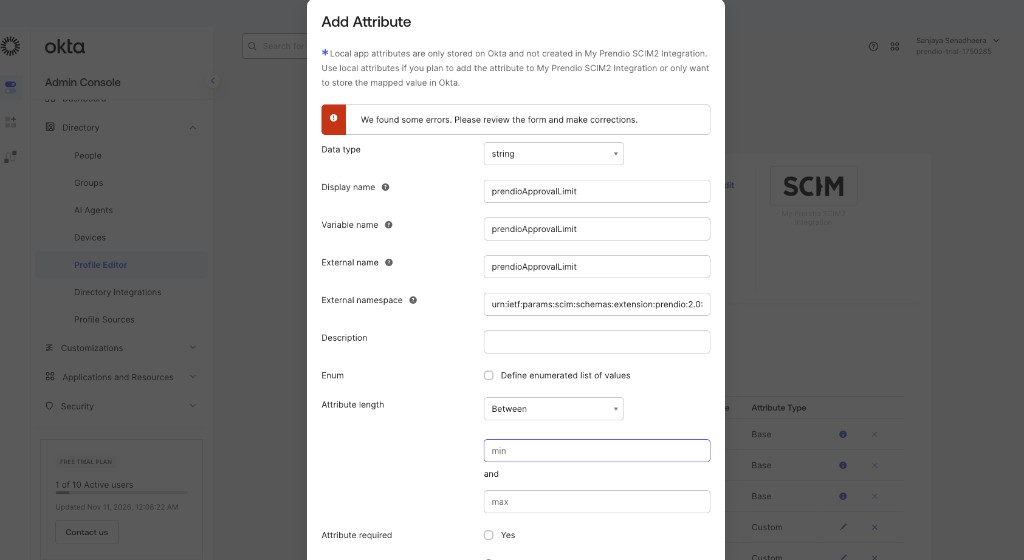
- Click Add Attribute again, enter the values for prendioSpendLimit, then click Save.
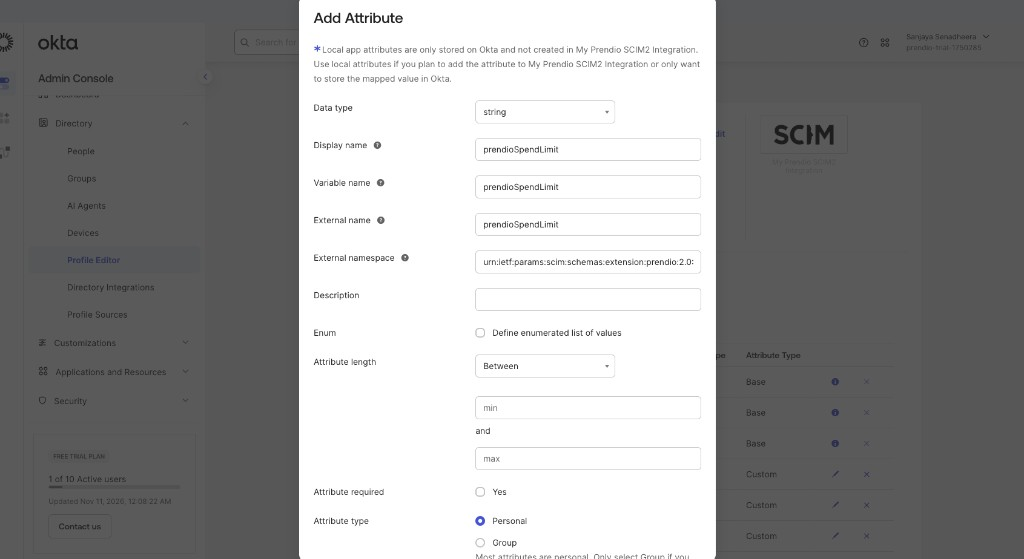
|
Field |
prendioApprovalLimit |
prendioSpendLimit |
|---|---|---|
|
Data type |
string |
string |
|
Display name |
prendioApprovalLimit |
prendioSpendLimit |
|
Variable name |
prendioApprovalLimit |
prendioSpendLimit |
|
External name |
prendioApprovalLimit |
prendioSpendLimit |
|
External namespace |
urn:ietf:params:scim:schemas:extension:prendio:2.0:User |
urn:ietf:params:scim:schemas:extension:prendio:2.0:User |
|
Attribute type |
Personal |
Personal |
Note: Copy each value exactly as shown, including the full external namespace.
Both attributes now appear in the profile's attribute list as Custom string attributes.

Assign Users or Groups
- Open the app and select the Assignments tab.
- Click Assign, then choose Assign to People or Assign to Groups.
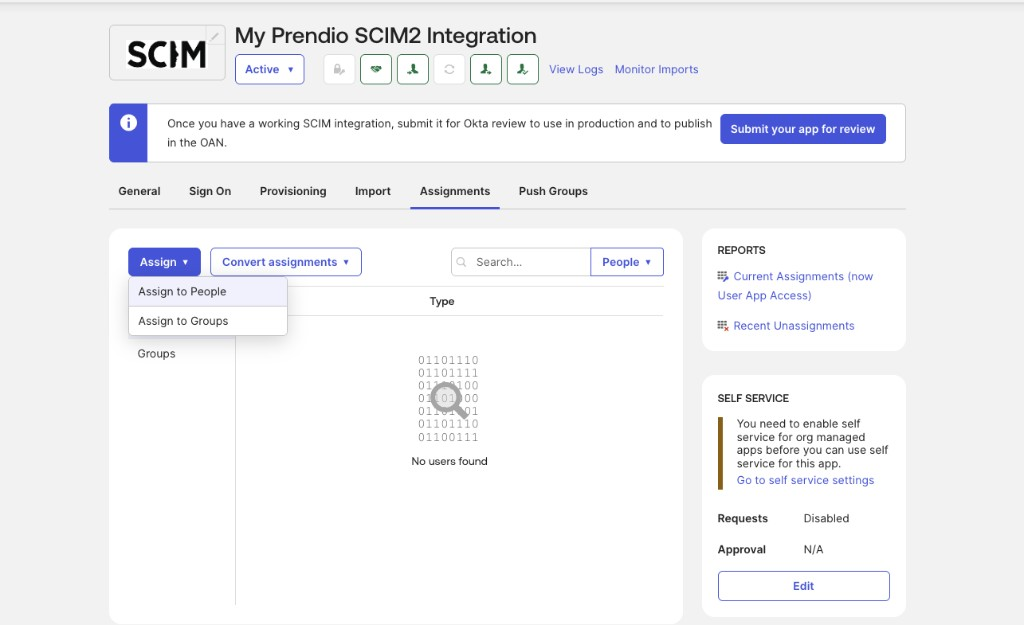
- Select the users or groups to provision to Prendio.
Once assigned, Okta begins provisioning those users to Prendio through SCIM. In Prendio, go to the User List to confirm the accounts were created.
All users are assigned the Requester role by default at provisioning.
For next steps — including adding, updating, and offboarding users — see SCIM Integration With Okta.
Troubleshooting
Test API Credentials failed. Confirm the SCIM 2.0 Base URL and token were copied in full from Admin > User Provisioning in Prendio. If the token was regenerated in Prendio, the previous token no longer works — paste the new token into Okta and test again.
Users were provisioned, but their approval limit or spend limit is blank. Check that both custom attributes were added in the Profile Editor with the exact values listed in Add the Prendio Custom Attributes above, including the external namespace.
A user's department is wrong or missing. Department names sent from Okta must exactly match the department names configured in Prendio. Correct the value in Okta and the next sync will update it.
How do I get support? Submit a support ticket by completing the Support Ticket Request Form. Your Account Manager is also available for setup questions and guidance.
To help us resolve issues quickly, include:
- The specific user(s) affected
- What you expected to happen vs. what actually happened
- Any error messages from Okta's provisioning logs
- When the issue first occurred