
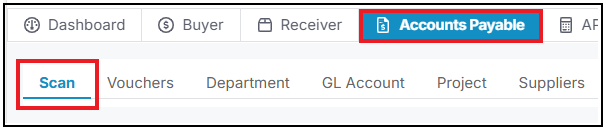
This is where Scanned Invoices are Uploaded then Matched to the appropriate Purchase Order.
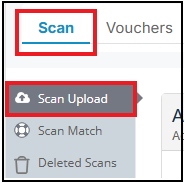
Accounts Payable > Scan > Scan Upload:
Users have the flexibility to choose how documents are processed when using Scan Upload:
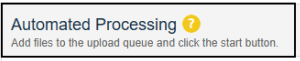
Automated Processing (OCR) – for faster, automatic data extraction. Please note that OCR can only handle single file uploads. Users must separate files before uploading via the Automated Processing queue, or upload these documents into the manual upload section:
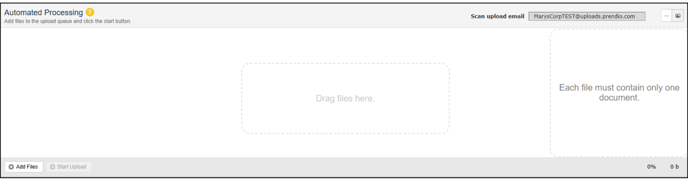
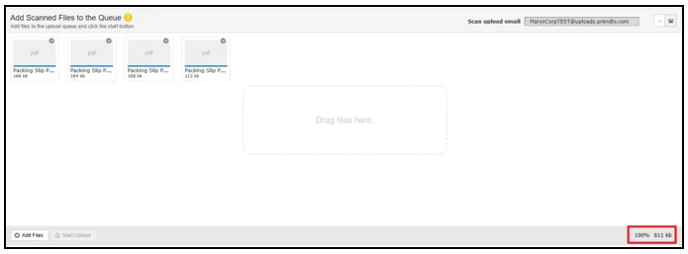
If Automated Processing is the preferred method, documents can be uploaded into Prendio using the company Scan Upload Email, eliminating the need to log into Prendio to upload them. The unique company upload email address will be shown in the top right of the Automated Processing queue:

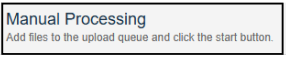
Manual Processing – Users can choose to manually upload documents if a human-reviewed approach is preferred. Documents including multiple files must be uploaded via Manual Processing:
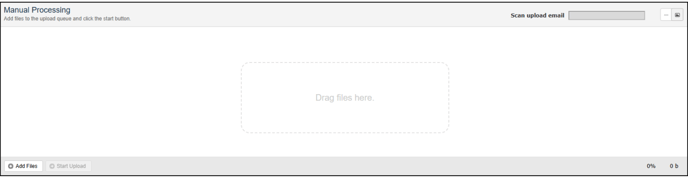
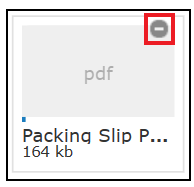
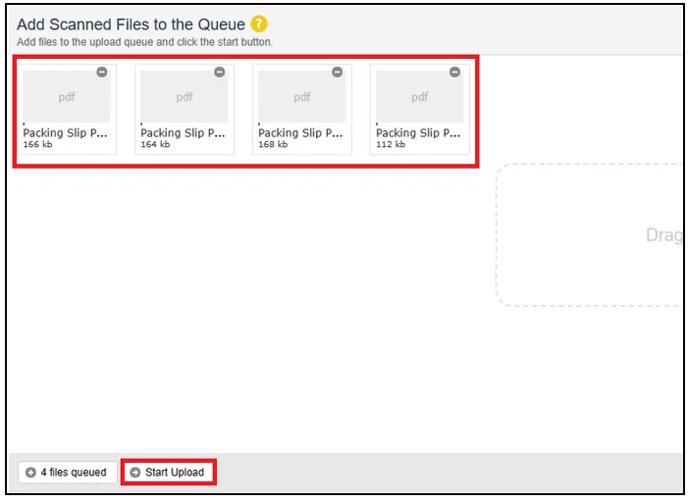
After determining how the documents will be processed (Autonmated vs Manual), PDF files can be dragged and dropped to the Add Scanned Filed to the Queue:
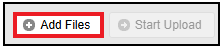
Or users can select Add Files to manually select PDF documents to upload:
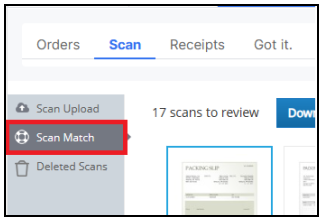
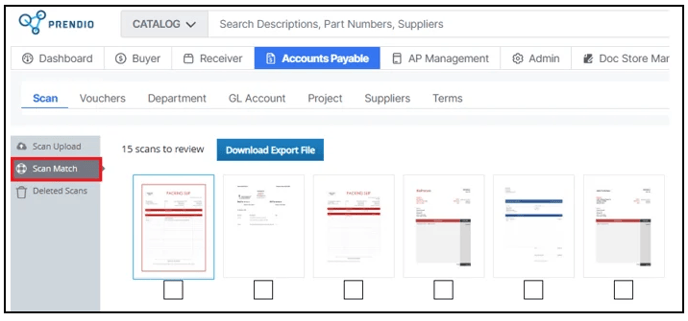
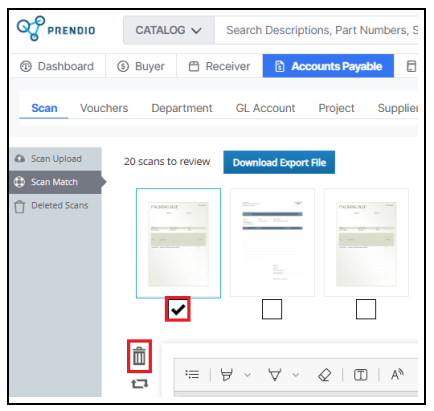
The Scan Match window is used to match the appropriate Invoice with a PO Number.
Please note that if areas in the Scan Match are greyed out, a service provider handles the company's Receiver and AP services. Users have view only access to keep track of the service provider processing invoices into Vouchers.
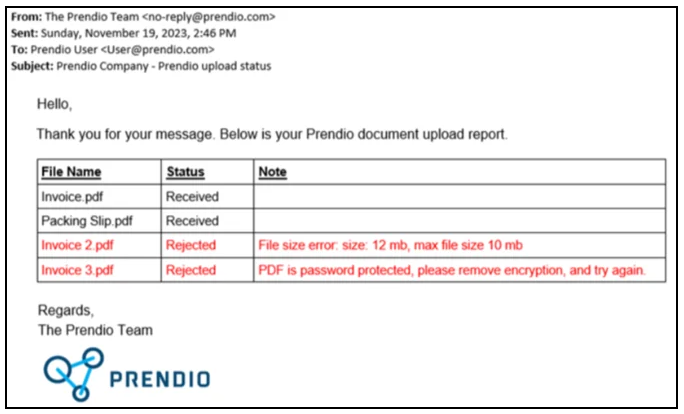
Invoices uploaded via Automated Processing or via Scan Upload Email will prompt OCR technology to automatically extract data from these files and process key details. The OCR tool will automatically attempt to match each document to an existing PO. Files in progress will display a loading indicator to the top right of the document and all fields will be greyed out until the process is complete: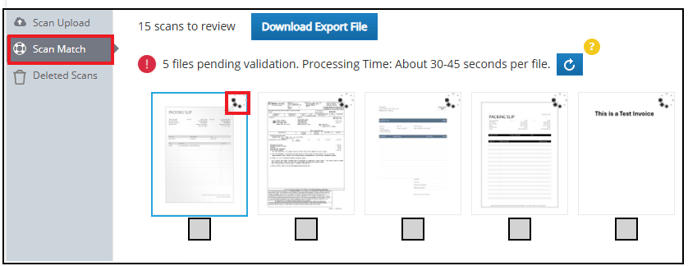
A message will appear indicating the number of files uploaded from Scan Upload. The validation process takes between 30-45 seconds per file, but users can also select the Refresh button to update progress:
OCR matches the invoices details with the corresponding purchase order. Once matched, invoices will move to the Vouchers tab of the Accounts Payable role for final processing.
If an invoice cannot be matched to an existing PO, the invoice will remain in the Scan Match queue with a note icon located on the top right of the document:

These invoices require manual review. After review, users can manually add in the invoice details including the PO #, Invoice #, Inv Date, Inv Amount, and any Tax & Freight. Select Done, Next to move the invoice to the Vouchers tab for final review:

Invoices uploaded via Manual Processing will stay in the Scan Match queue for human review. A user with the Receiver or Accounts Payable role must manually select the document and add details to the right:

When complete, select Done, Next to move the packing slip to the Vouchers tab for final review.
The number of scans to review appears here. If there are many scans to review, arrows will display to advance forward and back:

When a thumbnail is selected, it will display in a larger view:

The Invoice # field will prevent users from processing a document in the Scan Match that surpasses the character limit based on the company’s integrated ERP system:

The ERP systems and character limits are seen below:
QuickBooks Online - 21 characters
QuickBooks Desktop - 20 characters
NetSuite - 45 characters
Oracle Fusion - 45 characters
MS Business Central - 5o characters
Sage Intacct - 200 characters
Export only (no integration) - 200 characters
Additional Fields and Messages
If the Invoice Amount is greater than the PO Amount Remaining, a pop up window will appear indicating that there are insufficient funds on the PO to process the invoice:

Users have the opportunity to place create a voucher and place on Hold status to resolve pricing discrepancies. If additional funds or an increase to a unit price for a part line is required, users have the ability to do so on the voucher page. For more details, please visit:
Updating the Unit Price on a Part Line
If an Invoice was received but there is no PO Number available of the PO number is unknown. the box below can be selected:

When this occurs, the PO # field is left blank, and this box is checked. Checking this box activates the pulldown menu displaying the names of other Prendio Users. The user believed to be the Requester of this order can then be selected from the pulldown menu and can be sent a Proxy Request to confirm this is his or her order.
For more information, please visit: Understanding Missing PO And Packing Slip Proxy Requests
This window is used to process Scanned Invoices into Vouchers.
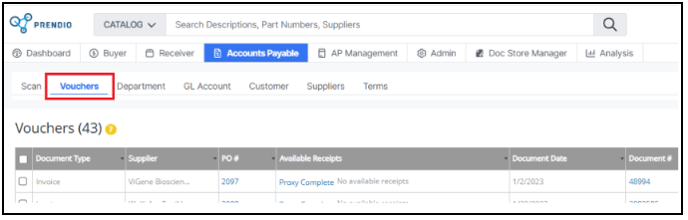
The Number of Vouchers is displayed here:

The Filter field can be used to search for data in this window and the Refresh button is used to clear the filter and display all receipts. Note: Checking Include Deleted will display orders that were deleted:

The Document Type, Supplier, PO #, Available Receipts, Document Date, Document # Voucher #, Voucher Status, and Notes columns can be sorted using the Arrowhead icons:

Clicking on the link in the PO # column will display the PO in another browser tab:

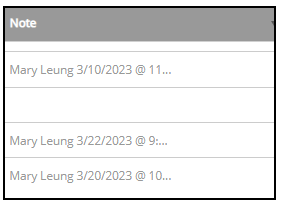
In the Actions column, notes can be added to the voucher:


If notes have been added, the icon turns green:

Vouchers created through OCR can be identified by an automatic note that includes the date, time (ET), and the message: Voucher created via automated scan match process along with details on whether an associated receipt is available for the voucher:

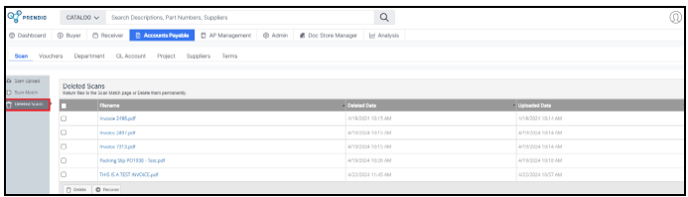
The Trash Can icon can be used to delete a Scanned Document. Deleting a document will return it back to the Scan Match:

A receipt can be found via Available Receipts. A voucher can have multiple receipts if more than one packing slip or proxy packing slip has been received against the same invoice. Clicking on the link (Rec#) for the receipt will display the details in a new window.
A receipt created from a packing slip uploaded by the Receiver:
A receipt created from a proxy packing slip by the Receiver:

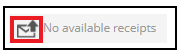
Vouchers that do not have a receipt processed against the invoice will see a message indicating there are No available receipts:

Even if a Proxy Packing Slip request is Complete, a user with the Receiver role must process this into a receipt. If a Proxy Packing Slip is not processed into a receipt, the column will indicate Proxy Complete, but there will not be a receipt number listed after:

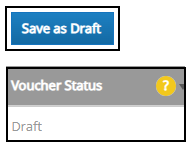
Pending - Pending review by the AP user to make necessary adjustments to process the voucher.
Held - Voucher is in a hold status for the AP user to initiate a correction or for internal review.
Awaiting Correction - Voucher is marked as requiring a correction due to an invoice discrepancy. A partial credit memo should be attached to resolve this matter.
Awaiting Additional Funds - Voucher is marked as requiring funds to be added to the PO due to an invoice discrepancy. A request for additional funds should be sent to resolve this matter.
Awaiting PO Update - Voucher is marked as requiring an update to the PO due to an invoice discrepancy. An increase to the unit price for a part line or any remaining types PO edits should be made to resolve this matter.
Rejected in Reapproval - Status will be displayed when a request for additional funds or a unit price increase is denied. The AP user is prompted to resolve this matter internally.
Select View in the Actions column to open voucher details:

Voucher details will display on the next screen:

Please note that View will be available for all vouchers; however, if a receipt is not available, users will see No Receipt Available and will not be able to select Done, OK to Pay:

After confirming the Invoice details (left) match the Receipt details, the Receipt checkbox is selected. Multiple Receipts can be selected for the invoice:


Add any tax or freight amounts reflected on the invoice in the fields located on the bottom right of the screen.
After selecting the correct receipt(s) that matches the invoice, verify that the total invoice amount in Prendio matches the actual invoice total.
If a voucher was created via OCR, tax and freight details automatically populate in these fields. Users can also manually add in these fields or adjust if needed:

Confirm that the Invoice Total in Prendio matches the total on the invoice. After confirming details are correct, select Done, OK to Pay:

The voucher moves to the AP Push tab of the AP Management role ready to push by export or by connector to an ERP system.
Prendio Flexible Accounting Segments
Prendio uses Flexible Segments which allows a company to Rename, Increase, or Decrease the number of Segments (aka Coding) to Integrate with an ERP System.

In this example, the company is using three segments, Department, GL Account, and Project. The number and naming of the segments that display in Accounts Payable are configured in AP Management > General > Accounting by the AP Manager role and Prendio Technical Support. The defaults are selected here, but you may see fewer or more segments and perhaps the names Class and Location.
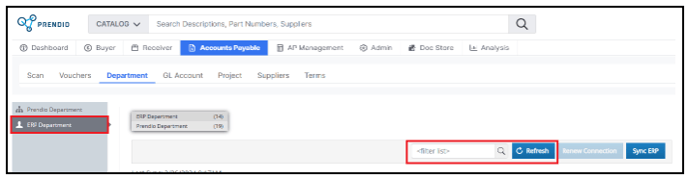
Accounts Payable > Departments
This window is used to manage the Prendio Departments and the ERP Departments. Prendio Departments is selected, this is where the Prendio Departments are created and saved:
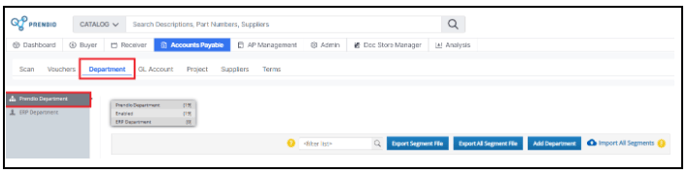
The number of Prendio Departments, ERP Departments, and how many are enabled are displayed here:

The Filter field can be used to search for data in this window. Download Export File exports the contents of this window to a .CSV file, and the Add Departments button is used to create new Departments. Users can also Import All Segments from a .CSV file to import new segments or update existing segments:
![]()
The Prendio Name, Prendio Display Description, Watchers, Approvers, GL Account, ERP Map, and Status columns can be sorted using the Arrowhead icons:

The arrowheads next to the Prendio Names can be used to move the Departments up and down in this window. This affects the order in which they appear in the Department pulldown menu in a cart:

In the Action column, the Edit (pencil) icon can be used to edit a Department and the Trash Can icon can be used to delete a Department. In this example a Department was edited, and the General tab is displayed:
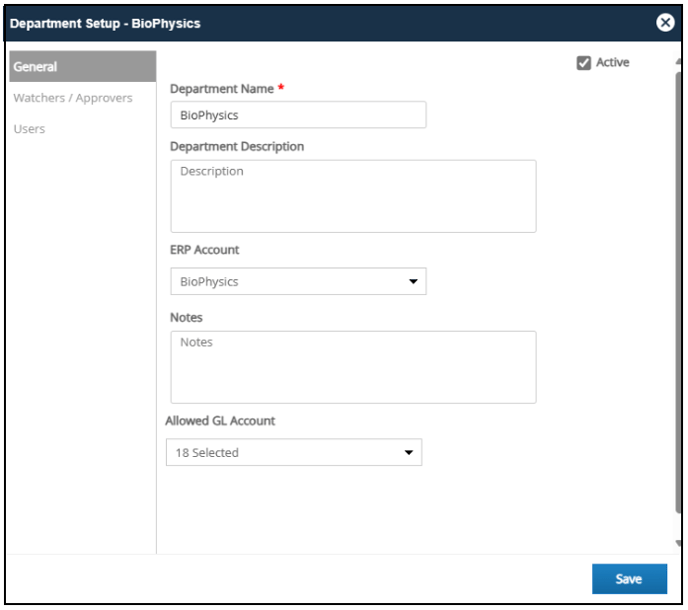
The Department Name field is where the name is entered:

Active must be selected for the Department to be available for use in an order:

The ERP Map pulldown menu is used to select the ERP Department that will be used for this Department:

The Description and Notes fields are optional. Adding a Description for a Department will appear in a user's cart to help them determine if this is the best selection for the order.
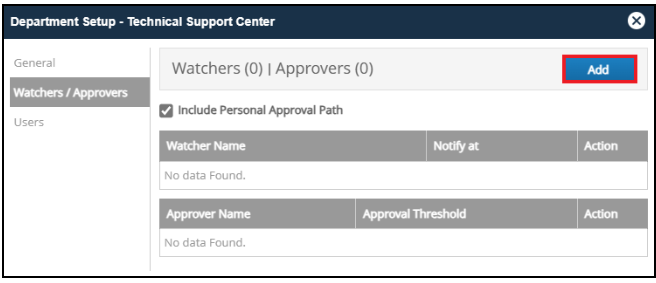
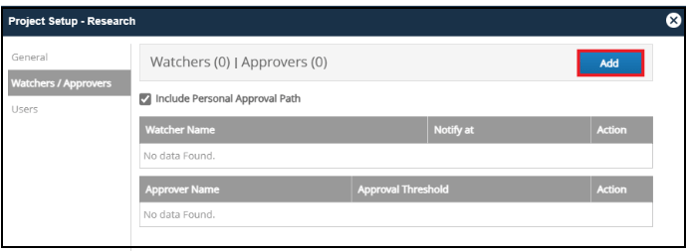
Press Add to open a window to add Watchers/Approvers:

*For more information regarding adding Segment Watchers/Approvers, please visit: Flexible Segment Approvers
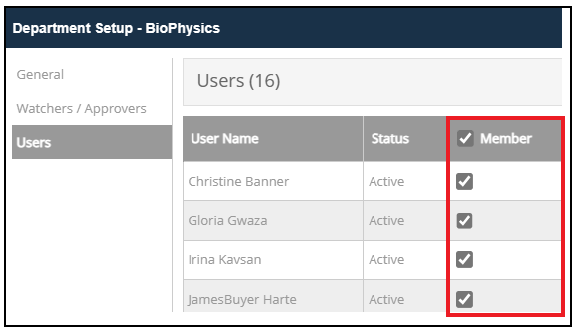
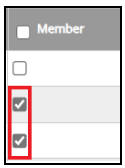
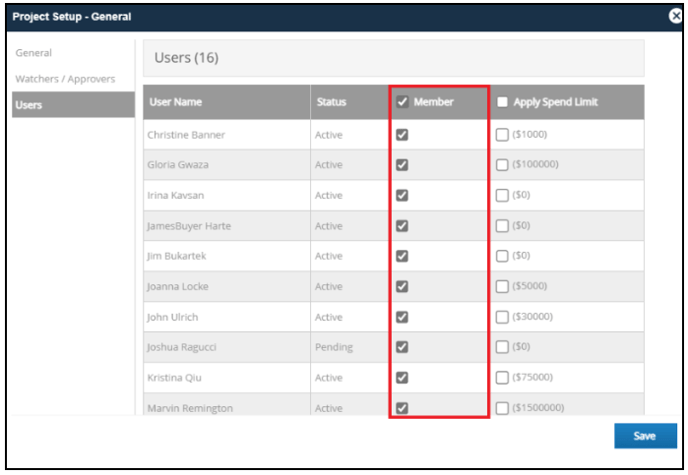
The Users tab is then selected. For a Department to be available in a cart the user must be a member of the Department selected in that cart:

The last Sync completed displays here:

The ERP Department ID, ERP Departmentt Name, Prendio Map, and ERP Type columns can be sorted using the Arrowhead icons. Selecting the box in the Disregard column will prevent the ERP Department not to display when mapping Prendio Departments:

Accounts Payable > GL Accounts
This window is used to manage the Prendio GL Accounts and the ERP GL Accounts. Prendio GL Account is selected, this is where the Prendio GL Accounts are created and saved:
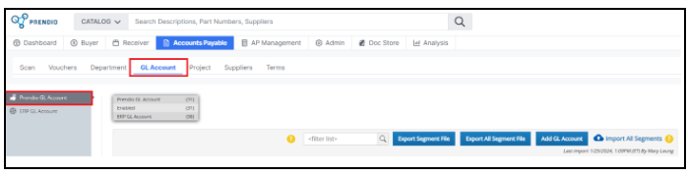
The number of Prendio GL Accounts, ERP/Accounting, and how many are enabled are displayed here:

The Filter field can be used to search for data in this window. Download Export File exports the contents of this window to a .CSV file, and the Add GL Account button is used to create new GL Accounts. Users can also Import All Segments from a .CSV file to import new segments or update existing segments:
![]()
The Prendio Name, Prendio Display Description, Watchers, Approvers, ERP Map, and Status columns can be sorted using the Arrowhead icons:
The arrowheads next to the Prendio Names can be used to move the GL Accounts up and down in this window. This affects the order in which they appear in the GL Account pulldown menu in a cart:

In the Action column, the Edit (pencil) icon can be used to edit a GL Account and the Trash Can icon can be used to delete a GL Account. In this example a GL Account was edited, and the General tab is displayed:
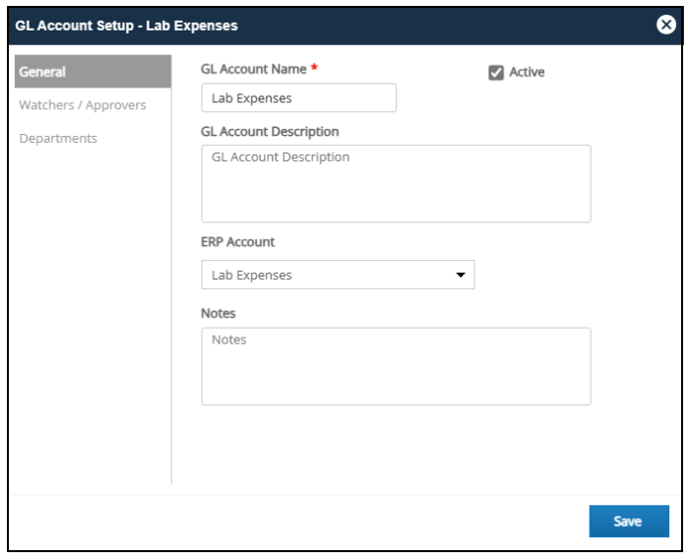
The GL Account Name field is where the name is entered:

Active must be selected for the GL Account to be available for use in an order:
The ERP Account pulldown menu is used to select the ERP Account that will be used for this Prendio GL Account:

The Description and Notes fields are optional. Adding a Description for a Department will appear in a user's cart to help them determine if this is the best selection for the order.
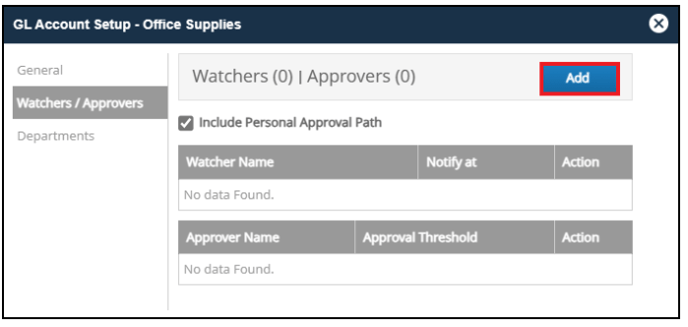
Press Add to open a window to add Watchers/Approvers

*For more information regarding adding Segment Watchers/Approvers, please visit: Flexible Segment Approvers
The Departments tab is selected displays here. For a GL Account to be available in a cart the GL Account must be a member of a Department selected in that cart:
Tax and Freight Assignment:
How the Tax and Freight expenses are to be paid can be selected here:
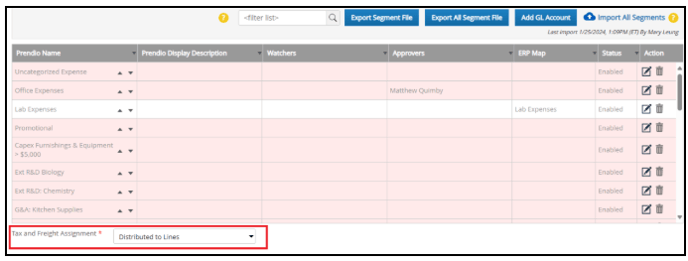
Distributed to Lines is the most frequently used selection. This will divide the expenses evenly among the line items in an order:

Specific Accounts is another option. This option allows these expenses to be distributed to specific GL Accounts:

Note: Tax and Freight can also be configured in AP Management > General.
When ERP GL Account is selected, this is where the ERP Accounts are imported and stored. The Filter field can be used to search for data in this window and the Refresh button is used to clear the filter:


The ERP GL Account ID, ERP GL Account Name, Prendio Map, and ERP Type columns can be sorted using the Arrowhead icons. Selecting the box in the Disregard column will prevent the ERP Department not to display when mapping Prendio GL Accounts:
Accounts Payable > Projects
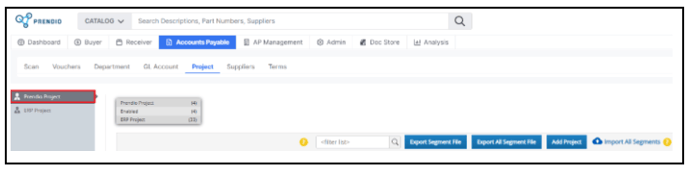
The Filter field can be used to search for data in this window. Download Export File exports the contents of this window to a .CSV file, and the Add Departments button is used to create new Departments. Users can also Import All Segments from a .CSV file to import new segments or update existing segments:
![]()
The Prendio Name, Project Manager, Prendio Display Description, Watchers, Approvers, Purchases, ERP Map, and Status columns can be sorted using the Arrowhead icons:
The arrowheads next to the Prendio Names can be used to move the Projects up and down in this window. This affects the order in which they appear in the Project pulldown menu in a cart:

In the Action column, the Edit (pencil) icon can be used to edit a Project and the Trash Can icon can be used to delete a Project. In this example a Project was edited, and the General tab is displayed:
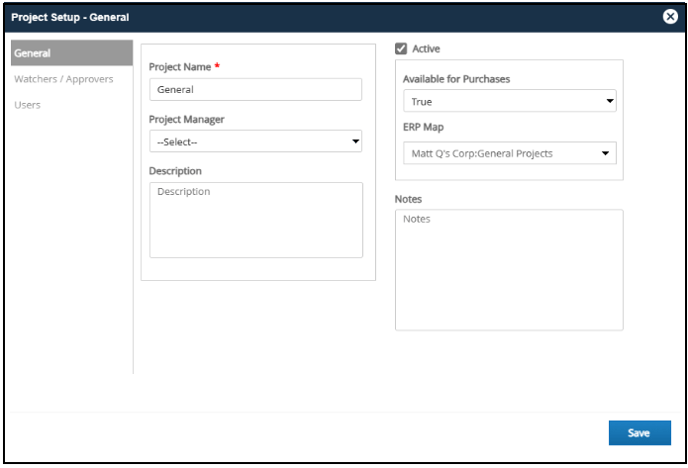
The Project Name field is where the name is entered:

Active must be selected for the Project to be available for use in an order:
The ERP Map pulldown menu is used to select the ERP Project that will be used for this Prendio Project:

Note: The Project Manager and Available for Time Table pulldown menus are optional, and the Available for Purchases pulldown menu should be set to True. The Project Description and Notes fields are also optional.
Press Add to open a window to add Watchers/Approvers

*For more information regarding adding Segment Watchers/Approvers, please visit: Flexible Segment Approvers
ERP Projects is selected, this is where the ERP Projects are imported and stored. The Filter field can be used to search for data in this window and the Refresh button is used to clear the filter::
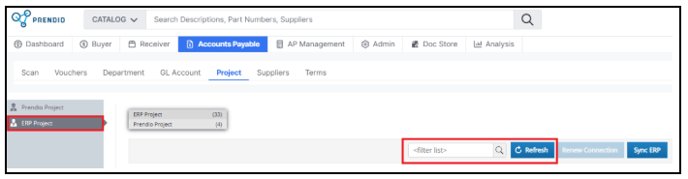


The ERP Project ID, ERP Dept Name, Prendio Map, and ERP Type columns can be sorted using the Arrowhead icons. Selecting the box in the Disregard column will prevent the ERP Department not to display when mapping Prendio Projects:

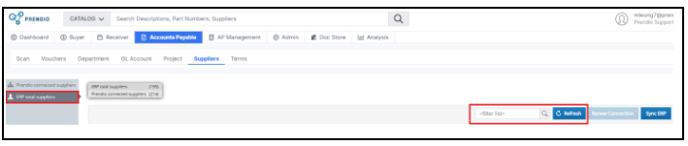
Accounts Payable > Suppliers
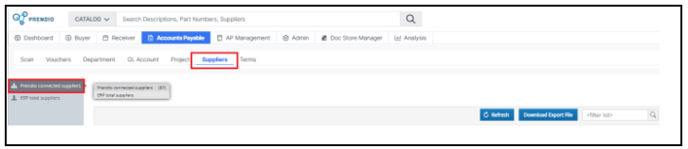
The number of Prendio Connected Suppliers, and ERP Total Suppliers are displayed here:

The Refresh button is used to clear the filter. The Filter field can be used to search for data in this window. Download Export File exports the selected suppliers to a .CSV file:

The Supplier, Enabled, and ERP Link, and ERP Suppliers columns can be sorted using the Arrowhead icons:

The All checkbox can be selected to include all suppliers or Individual Supplier checkbox(es) can be checked to include certain suppliers in the Supplier Export File:

Click on the link to the Supplier Name to edit a supplier:

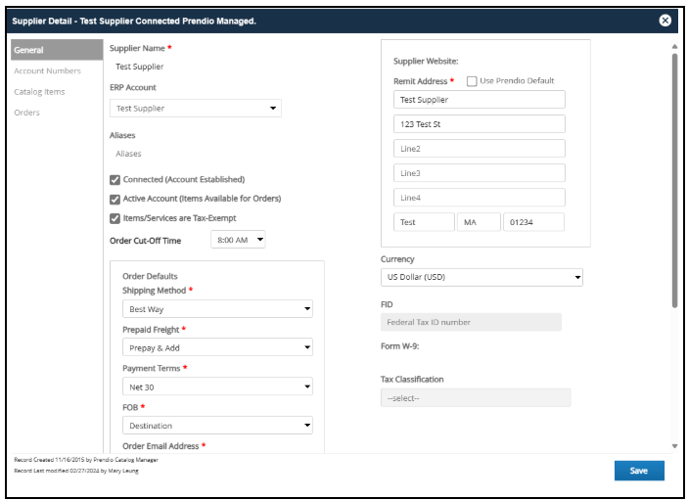
The ERP Account field is where the ERP Supplier is selected:

Note: Bills for this supplier will be pushed to this supplier in the ERP System.
These fields and boxes are completed by the Prendio Catalog Manager and the Buyer when the supplier was added to Prendio and an Account was established. Note: These fields can be changed at the customer level:

Notes can be added for internal reference:

This is the Email and Remit to Address information for the supplier that will be sent to the ERP System during a Push:

Note: Deselect Use Prendio Default to modify the address to push different address information for the supplier.
The Currency is setup by the Prendio Catalog Manager. Note: This field can be changed at the customer level:

The FID, W-9, and Tax Classification fields can be updated as needed:

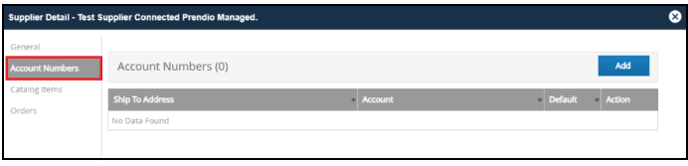
Account Numbers can be added to this tab when needed.

The last Sync completed displays here:

The ERP Supplier ID, ERP Supplier Name, Prendio Map, and ERP Type columns can be sorted using the Arrowhead icons. Check the box in the Disregard column for that ERP Supplier not to display when mapping Prendio Suppliers:
Accounts Payable > Terms
This window is used to manage the Prendio Connected Terms and the ERP Connected Terms. Here Prendio Connected Terms is selected where the Terms are saved:
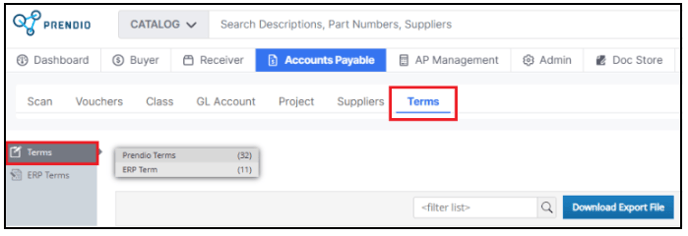
The number of Prendio Terms, and ERP Terms are displayed here:

The Filter field can be used to search for data in this window. Download Export File exports all Terms to a .CSV file:

The Prendio Name, and ERP Map columns can be sorted using the Arrowhead icons:

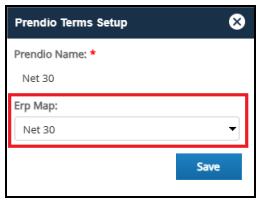
In the Action column, click on the Edit (pencil) icon to edit a Term. The Prendio Terms Setup window appears. In the example below the Prendio Net 30 Term was edited in the Prendio Terms Setup window. The ERP Map dropdown menu is used to map to map this term to the corresponding ERP Term.:
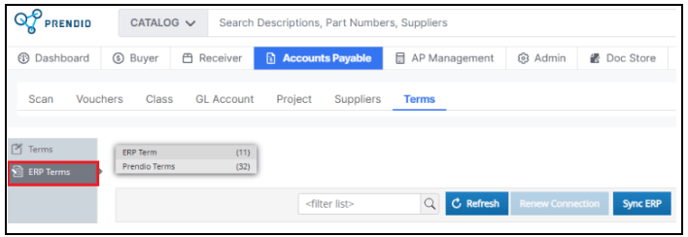

The last Sync completed displays here:

The Term ID, Term Name, Prendio Map, and ERP Type columns can be sorted using the Arrowhead icons. Check the box in the Disregard column for that ERP Term not to display when mapping Prendio Suppliers: