
The Requester role is symbolized by the Dashboard in Prendio and is assigned to all users. Requesters have the ability to create orders for parts or services as well as approve orders if needed.

Uploading Packing Slips via the Receiver Role
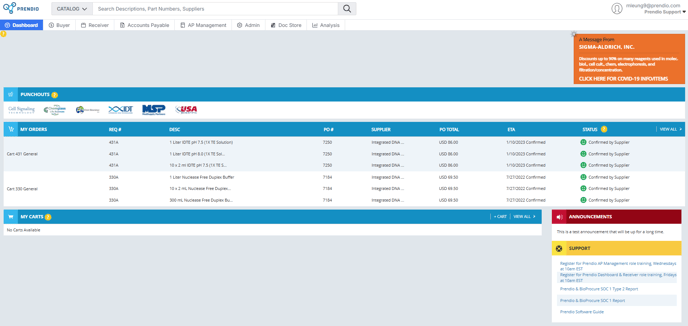
The top right of the Dashboard will field displays how a user is logged into to Prendio along with the company:

Tabs found on the Dashboard underneath the search field will list each Prendio Role assigned to a user by an Admin:

The Notification field will be located under the role(s) assigned to a user. In this example a Supplier Welcome Card appears:

Approval Requests may also appear in this field along with Proxy Packing Slip Requests and other notification types. If a Notification appears, users can click on it to reply to the request:


The My Orders section displays the orders submitted by a user:
![]()

Not all of the orders a user creates will display in the My Orders section; however, users can select View All to display all orders:

My Carts displays the carts created by a user but have not been submitted yet:
![]()
Clicking on + Cart will create a new Manual cart:

My Carts will display the 5 most recent carts created but have not been submitted in case adjustments are required before submitting as an order. Users can select View All to display all carts:

The Support section contains links to announcements as well as a link to the Prendio Help Docs resource center. In the software guide, users can search for information and there are also fields on information by topic:

How To Create An Order
There are 3 ways to create an order, Punchout, Catalog, and Manual cart.
All orders processed through Prendio start as a Cart. When that Cart is submitted the Cart is Closed and a Requisition is created. The Req may need to go through Approvals first but when it reaches the BioProcure Buyer and is Confirmed with the Supplier, a PO Number is assigned.
Once an order is placed, the Prendio Three-way Match must be Complete to be processed through Prendio. This match consists of the PO + Packing Slip + Invoice.
Creating A Cart With A Punchout

After clicking on the punchout icon, users will be directed to the supplier's punchout website:

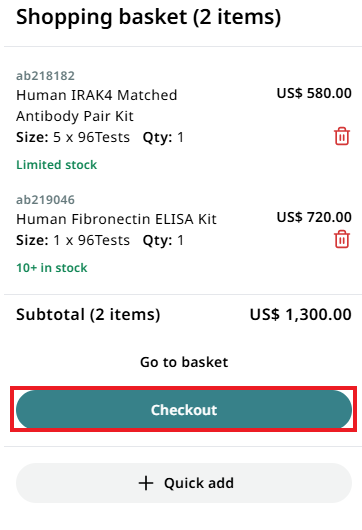
Complete a search on the punchout website and add needed products to the cart:
Continue to search for needed items and add to the cart. When all needed products have been added to the cart, Checkout to return to Prendio:
A new cart is automatically created with an Order Type of PunchOut Order:

Ensure that the Accounting Segments for each line is complete:


Submit Cart on the bottom right to complete:

For additional information regarding Punchout orders, please see:
Creating A Cart Using The Catalog Search
On the top of the Dashboard will be a search bar defaulted to Catalog search. The catalog stores items ordered in the past by users at a company and certain suppliers upload their own product catalog. Users can search the catalog to create a cart.
Please note that it is possible that items will not be found after completing a Catalog search. If certain items are not found in the search, users can create a Manual Cart to include part numbers, description, and pricing.
Locate the search bar and type in key terms for item(s) that need to be ordered:
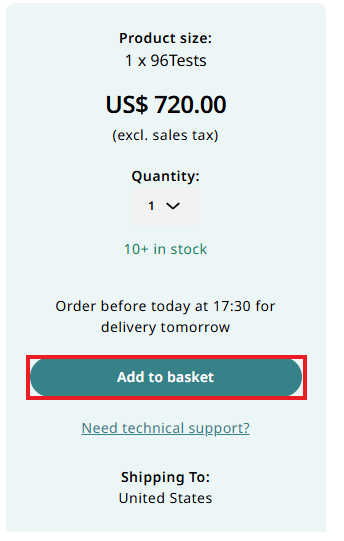
Prendio then finds products that match the search criteria. Users can select Add to cart followed by Create new cart to order an item:

A new cart is automatically created with the details of the product:

Select the Order Type:

Information regarding Order Types can be found here:
Understanding Prendio Cart Order Types
Ensure that the Accounting Segments for each line is complete:
Submit Cart on the bottom right to complete:
For additional information regarding orders created via Catalog search, please visit:
Using The Prendio Catalog Search To Order Items
Creating An Order From A Manual Cart
If a punchout is not available for a supplier or if items cannot be located after completing a Catalog search, users can create a Manual cart to complete the details for items or services needed.
From the Dashboard, locate the My Carts section and select +Cart:
Similar to a cart created from a punchout or catalog search, a Cart Number will be assigned. Complete the details in the top fields including a Ship To address, Cart for, Order Type, and Accounting Segments:

The selections for Order Type are I will place the order and Buyer will Place Order:

When I will place the order is selected the Requester will receive a PDF copy of the PO by email. After receiving the PO, the requester will be responsible for submitting the PO to the supplier to place the order. The requester will also be responsible for communicating with the supplier to ensure confirmation of the order along with an ETA or timeline for delivery.
A popup message appears indicating the Requester's responsibilities when selecting I will place the order:


Note: Suppliers that appear when typed are in the Prendio Catalog. Suppliers that display a Circled Check Mark next to their name are connected to the company. If a Supplier is not connected to a Buyer will complete this process. For additional information regarding new suppliers, please visit: Adding A Supplier To Prendio
If the supplier name is not in the catalog can be added. Type the Supplier Name then add the supplier website or email address:

Attach a copy of the supplier's W-9. Select Request Supplier when complete:

Complete the details of parts or services including the Part#, Description, Price, Unit, Currency, and Qty:

Notes and Attachments for the Supplier and Internal, Buyer can be added using these fields:

Ensure that the Accounting Segments for each line are complete:
Users can select Apply to all lines to auto populate the segments for each line in the cart:

If additional Part or Services line need to be added, select Add Part or Add Service to add another line:

Note: The additional line item can be for the same or a different supplier. After a cart is submitted, Prendio will automatically separate into multiple orders if using different suppliers.
Submit Cart on the bottom right to complete:
Note: After a cart is submitted a requisition is created. The requisition is assigned a number consisting of the cart number with the letter A appended to it.
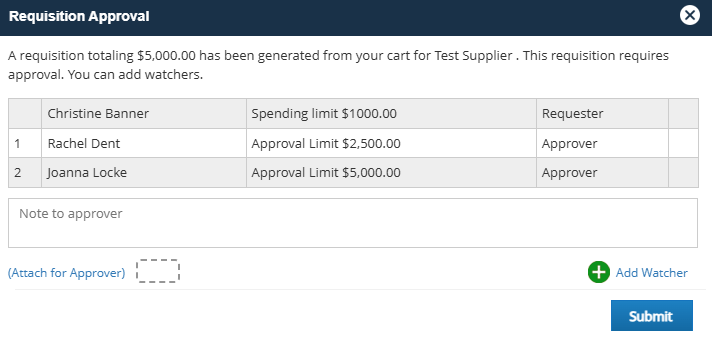
This window also includes fields to enter a note and/or attach file(s) for the approver.
Watcher(s) can also be added by selecting Add Watcher. Clicking Add Watcher will take the user to a list on your company’s Prendio users. When Watchers are added, they will be notified of the order but do not need to approve the order.
Submit to on the Approval Window to create the requisition to process after the approval process is complete.
For additional details regarding Manual Carts, please visit: Creating an Order with a Manual or Custom Cart
Uploading Packing Slips via the Receiver Role
Prendio uses a three-way match of the Packing Slip (Receipt), Invoice (Voucher), and Purchase Order when processing an order. This information is also pushed to your ERP System when the order is complete. For this reason, it is very important for Packing Slips to be processed when they are received. Processing of the Packing Slips to Receipts is done by the Receiver Role:

Uploading A Packing Slip
In the Receiver role, select the Scan tab:

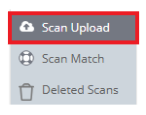
PDF files can be dragged and dropped to the Add Scanned Filed to the Queue or users can select Add Files to manually select PDF documents to upload:

Note: If documents are already in the Scan Upload window, the Add Files button will display + # Files Queued and can be used to upload additional documents:
![]()
Documents added to the queue can be deleted by selecting the minus symbol on the top right of the document:

Select Start Upload to upload the PDF Documents:

When an upload of a document is complete, a Check Mark appears in the corner of document:

100% appears in the corner of the window when the upload is complete:

After the documents are uploaded, they migrate to the Scan Match section of the Scan tab:

Thumbnail views of the uploaded PDF Documents appear at the top. They will eventually be matched to the appropriate Purchase Order (PO):

Details of the packing slip can be added to the right (after selecting the document by checking off the bottom:

If a document needs to be deleted, check off the bottom of the document and select delete (trash icon):

The date the Packing Slip was received and the PO it is to be matched are entered.
Note: If a service provider performs the company’s Accounts Payable services the areas in the Scan Match will be greyed out.