All features and sections in this document are also available as individual Knowledgebase documents.
Some features are still in development or not yet implemented and are noted so.
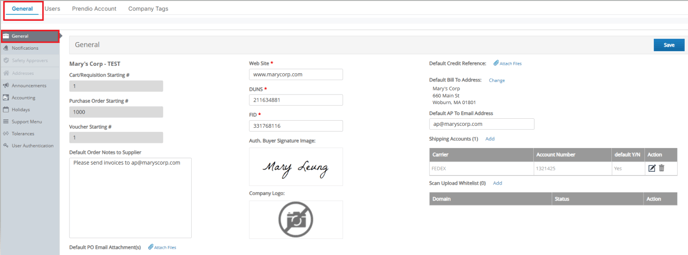


The domain will appear in the Scan Upload Whitelist table. A green checkmark will appear in the Status column indicating that the domain is Active:

Adjustments to each domain can be made via the Action column (Edit or Delete):

Additional domains can be added:

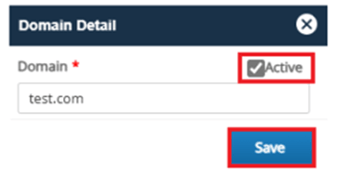
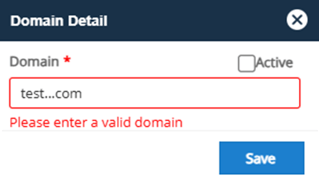
If a domain needs to be deactivated, select Edit in the Action column:

Uncheck the box to the left of Active and Save:

The domain will be deactivated and a red X will appear in Status:

Domains can be deleted via Actions if this is the preferred method. Deactivating a domain allows the domain to remain in the table for historical purposes. Deactivating a domain may also be preferred if this action is temporary and the domain will be re-activated in the future.
Select Save at the top right of the page when the configuration is complete:

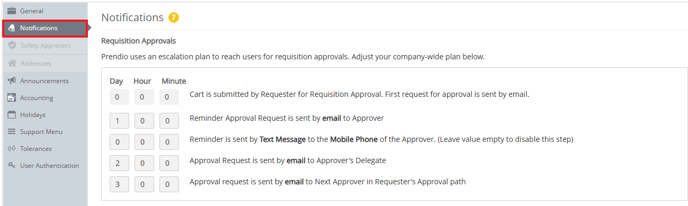
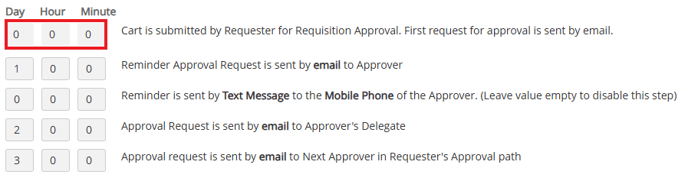
The Reminder Approval Request is sent to the approver if he or she does not respond during the time configured here. In this example if the approver does not respond in 1 day, a Reminder Email Notification is sent to that approver:

Text Message Reminders can also be configured. If the approver does not respond to the Reminder Approval Request within the time configured here, a Text Message Reminder can also be sent.
Notes: If a time is not entered for text message notifications this type of notification is disabled.
To receive text message notifications the approver’s cell phone number and carrier must be specified and this feature also must be enabled in their Prendio User Profile:

A Delegate Approval Request is sent to that approver’s delegate if the approver does not respond to any of the previous approval requests. In this example a request is sent in 2 days of when the cart was submitted to the Approver’s Delegate if the approver did not respond to any requests.
Note: The Approver’s Delegate is immediately notified if Out of Office (OOO) is configured in the Approver’s Prendio User Account Setup.

The Next Approver in the Requester’s Approval Path is sent an approval request when a requisition requires more than one approver. In this example a request is sent in 3 days of when the cart was submitted to the Next Approver:


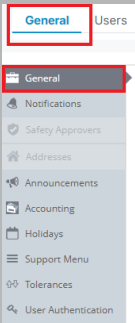
Admin > General > Accounting

New Supplier Approval can be enabled. To enable this feature click in the New Supplier Approver pulldown menu to select a Prendio User from the list. Once enabled, that user will need to approve any new supplier requests for your company:

Enable ERP Integration This feature is not selected by default. When not enabled Prendio orders are Exported as CSV (comma separated values) files for manual import into the ERP System. When enabled these orders can be pushed to the configured ERP System.
Note: The initial ERP Integration is completed with the assistance of the Prendio Technical Support. Please complete the Support Ticket Request Form when any changes are necessary.

ERP Connector Setup
All of these selections communicate website to website (online connector) with the exception of Quickbooks Desktop.
Note: Quickbooks Online will be used in this example.

The Renew Connection button is used to re-establish communication between the Prendio and Quickbooks secure websites. Please note that Renew Connection only appears if QuickBooks Online is the selected ERP system:

Prendio Flexible Segments
Common ERP Segments are how the Segments are named internally in Prendio. These names cannot be modified:

Prendio Segments are how the Segments are named in the Prendio User Interface (examples: Carts, Accounts Payable and AP Push):

The default names are used here. These can be changed to match the ERP Naming.
These are Optional Segments and can only be enabled with the assistance of Prendio Technical Support. Please complete a Support Ticket Request Form when any changes are necessary:

With the Prendio online connectors an AP Push Bundle can be selected. This will attach the document(s) in PDF format to the orders and these bundles will be pushed to these ERP Systems:

The documentation selections available display in the AP Push Bundle pulldown menu. The selections are Invoice + PO + Packing Slip(s) + Approval Summary, Invoice + PO + Packing Slip(s), Invoice + PO + Approval Summary, Invoice, and (do not attach any documents):

The Tax and Freight Assignment pulldown menu has 2 selections, Distributed to Lines and Specific Accounts. Selecting Distributed to Lines distributes the tax and freight between each line item in the order. Selecting Specific Accounts allows the Tax and Freight to be assigned individually to a GL Account:

An Accounting Note can be entered here. The note entered here will appear in the Scan Match window for the Receiver and Accounts Payable roles:

Save (bottom right of the page) when the configuration is complete:

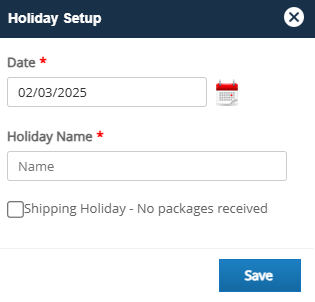
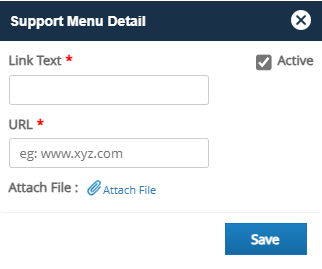
Support Menu Configuration
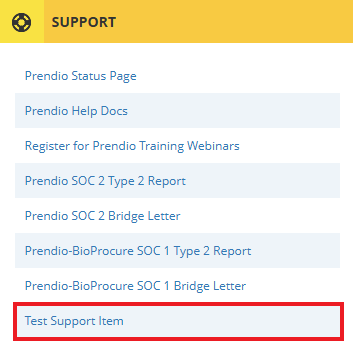
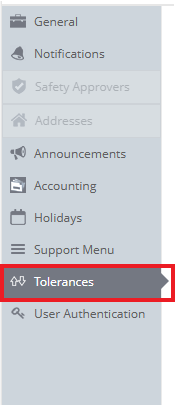
Buyer PO Creation defines the maximum amount of a Punchout order that can be submitted directly to a supplier without requiring review by a user with the Buyer role.

In the event that punchout orders should not be processed for whatever reason (ex. users are out of office, holiday closure, etc), Admin users can override both Buyer PO Creation settings in Tolerances and Punchout Buyer Review at $ for individual suppliers by enabling Punchout Threshold Override.
This setting allows users to temporarily override Buyer PO Creation in Tolerances and Punchout Buyer Review at $ for individual suppliers without needing to update each individual supplier. Original settings for both areas are in effect when turned Off.
To enable the override, toggle the Punchout Threshold Override setting to On(blue). The threshold for Buyer PO Creation will now be greyed out:


Receipt Creation is where the percentage of the quantity of an item received per order line without a PO revision:

Always Save when a change is made.

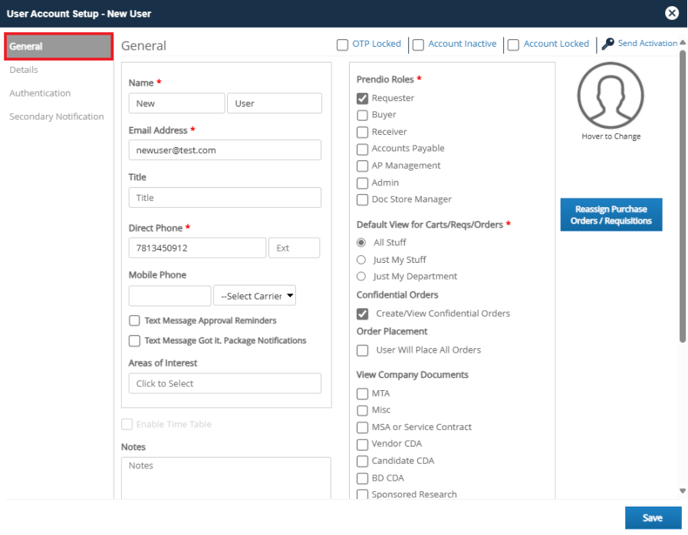
A User Account Setup window will appear. The General Tab will be selected on the left. Please note that the other sections (Details, Authentication, and Secondary Notification) will be disabled until the General Tab is completed and Saved:
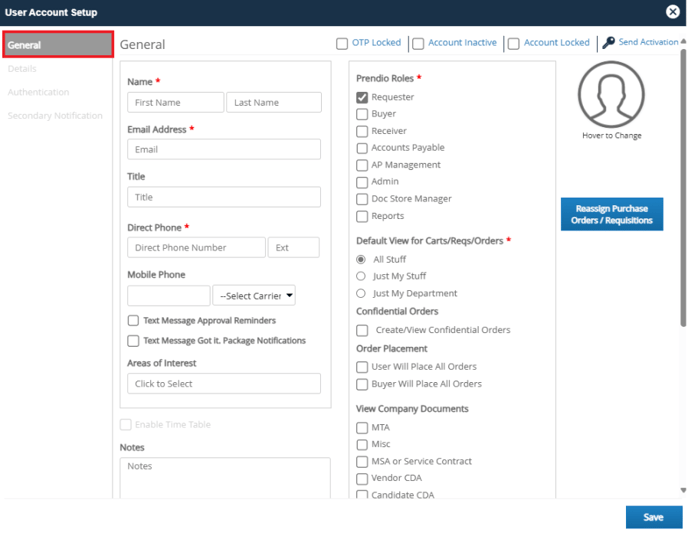
Create/View Confidential Orders must be selected if this user is to have access to view and/or Confidential Orders. Users with the Receiver or Accounts Payable role(s) must have Confidential Order access to view the Scan Match:

For more information regarding Confidential Orders and how this setting relates to Default View for Carts/Reqs/Orders, please visit: Confidential Orders.
Save when complete:
![]()
Details Tab - Required Fields, Completing the Personal Approval Path, and Assigning Segments
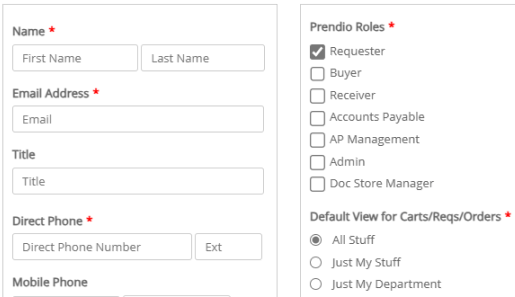
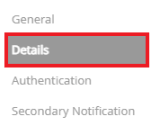
After completing the fields in the General tab and saving, the remaining tabs on the left, Details, Authentication, and Secondary Notification will be accessible. Select the Details Tab:
The user's Spend Limit, Approval Limit, Approval Delegate, and Next Approver must be selected.
Note: Clicking in the Approval Delegate and Next Approver pulldown menus will display a list of Prendio users to select from.

Select Add Approver to display a list of Prendio Users to manually select as Approvers to add to the user's Personal Approval Path:
![]()

- or -
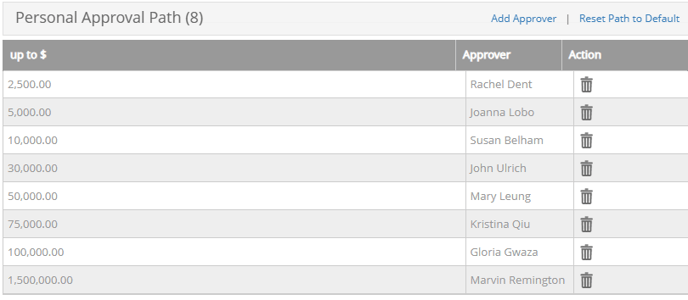
After a Next Approver is added, select Reset Path to Default for Prendio to automatically add the Approvers to the Personal Approval Path. Reset Path Default Builds the approval path based on The Next Approver Setting for each user.
![]()

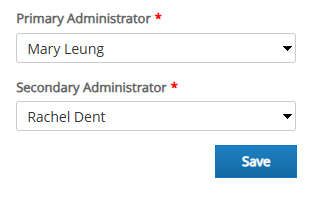
When Reset Path to Default is selected, Rachel (Next Approver) will be the first approver on the user's approval path, followed by Rachel's Next Approver (Joanna), Followed by that user's next approver (Susan) and so on until the top most approver:

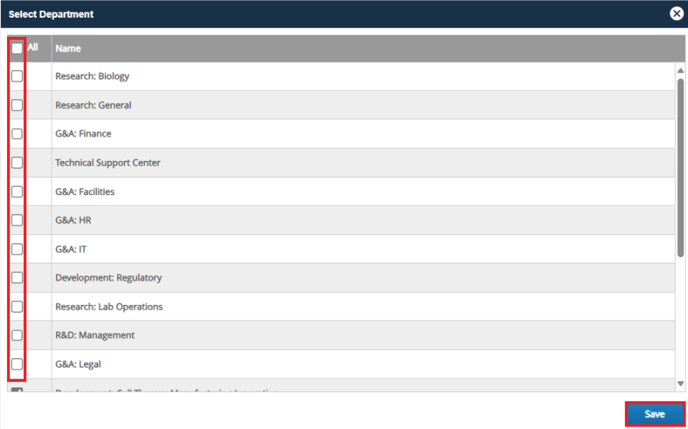
Check the box next to All to add the user as a member to all departments or manually select the department(s) the user should be a member of. Save when complete:
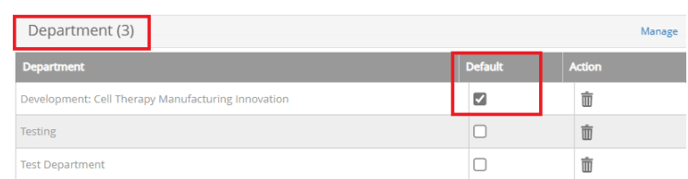
The Allowed Departments field now displays the number of departments this user is a member of. A department can also be selected as the default for the user.
Note: The Default Department will automatically be selected when the user creates a new cart.

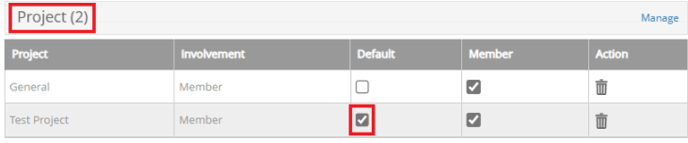
Check the box next to All to add the user as a member to all projects or manually select the project(s) the user should be a member of:

Note: Timetable is an option in Prendio that the users can post the times spent on projects. If your company has this option check the box under Timetable next to the Project(s) that should be available for time tracking.
The window automatically saves updates. Close this window when complete.
The Allowed Projects field now displays the number of projects this user is a member of:
Save on the bottom of the Details tab when complete:
![]()
Authentication Tab
The Authentication tab for a new user account allows an Admin to indicate if a user needs to log in via Single Sign-On:

If Single Sign-On is not enabled, the Auth Method will automatically default to Prendio and this tab does not need to be completed. The user will login to Prendio using their email address (as indicated in their account) and password. For more details about Single Sign-On, please visit:
Secondary Notification Tab
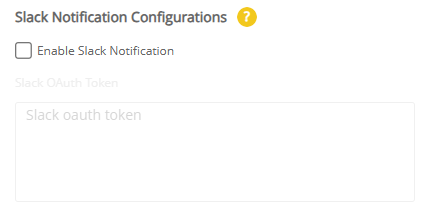
The Secondary Notification tab allows an Admin to indicate the user's Slack username if Prendio is configured with Slack:

If Slack is not enabled, the Slack Username can be left blank. For more details about configuring Prendio with Slack, please visit: Setting up the Slack Integration for Prendio
Sending an Activation Email
Activation Request email sent will appear briefly:
![]()
Save and exit out of the User Account Setup window when complete:
![]()
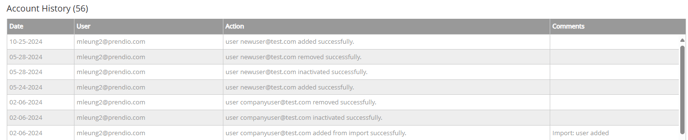
The table of users will appear. When creating a new user account, the status of the account appears as Draft. After sending an activation to a user, the account will display in a Pending status:


Additional Information

Noting The User's Delegate, Personal Approval Path, And Approver/Watcher Responsibilities
Admin > User > Edit User

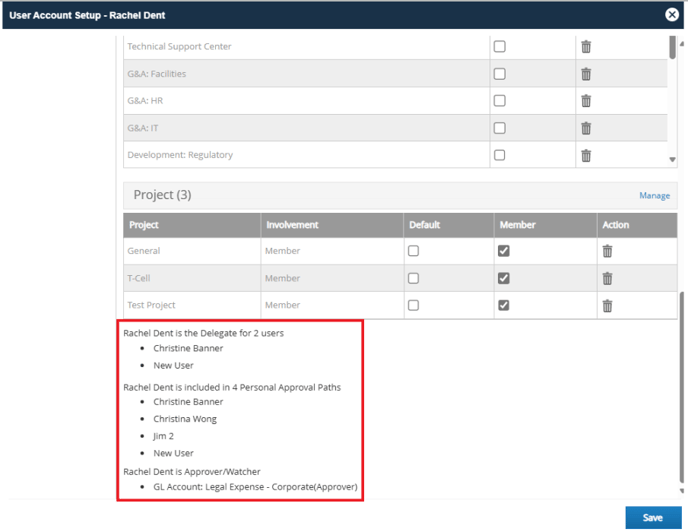
Select the Details tab. Scroll to the bottom to locate the user's Delegate, Personal Approval Path, and Approver/Watcher responsibilities:
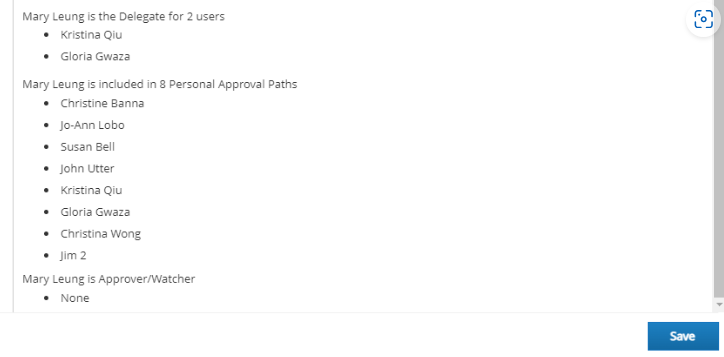
Note or Create A Screenshot of this information for reference during the editing of the users that will be impacted by this change.
Deactivating A Prendio User Profile
Before deleting a Prendio User Profile the profile must be Inactive.
Admin > Users > Edit User
Check the Account Inactive Box:

At the Confirmation window, press OK. Enter a Reason for this activity. Submit when complete:

Back at the User Account Setup window, select Save. Exit out of the User Account Setup window when complete:

Notes:
Prendio User Licensing Charges do not apply to Inactive Users. For this reason many customers choose not to delete these profiles. Instead, they are used future reference or historical purposes. Inactive profiles do not display in the Users window by default.
Deleting The User Profile
Admin > Users
Select the Include Inactive box:
![]()
Find the inactive user and select Delete:

Confirm Yes to delete:

A success message will appear at the top of the screen:
![]()
The user will no longer appear in the table of users even if Include Inactive is selected.